
Let’s talk brownies! There are so many different recipes and methods out there, but it all comes down to different preferences. Generally, I think a classic brownie should be gooey, super chocolatey and rich in flavour.
What are Brownies?
There are many brownie recipes and variations out there. They were first baked in the United States at the end of the 19th century. The popularity of brownies started to spread throughout the US and Canada and beyond in the twentieth century.
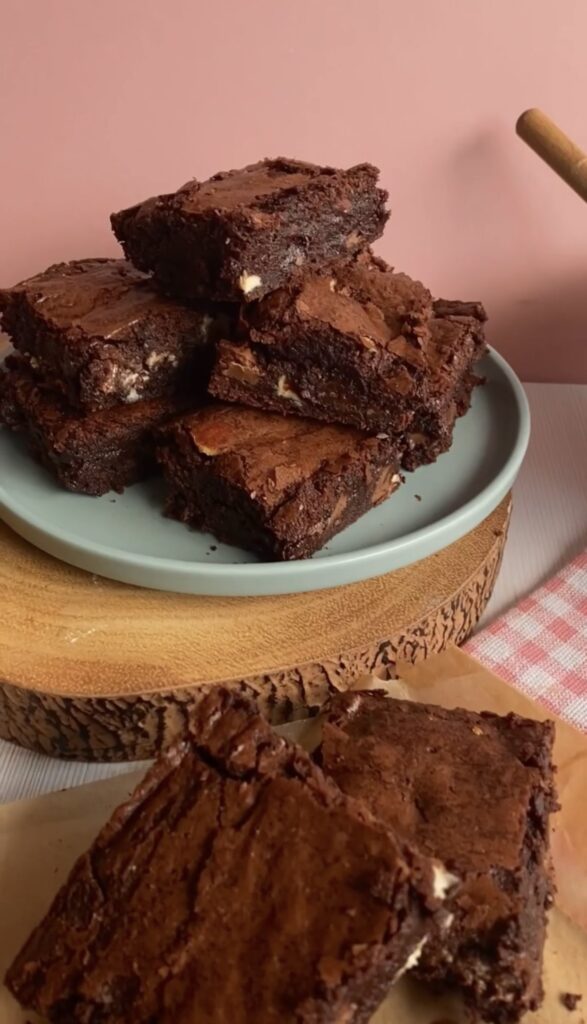
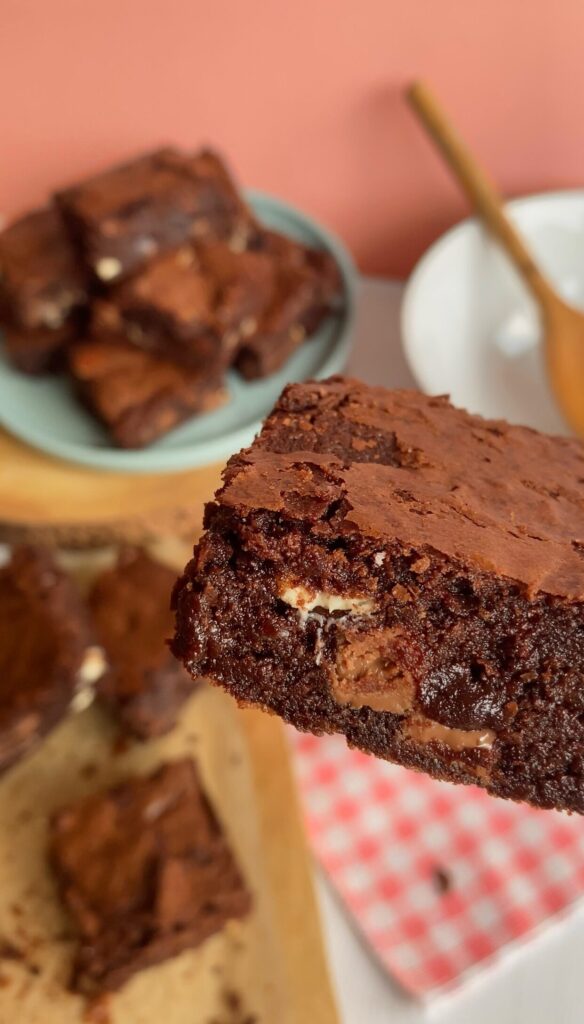
A brownie is a super chocolatey baked confection. They can either have a cakey texture, flaky crumb texture or fudgy depending on the density. Brownies don’t contain baking powder, so they are slightly heavier and denser in comparison to a cake. The traditional way to serve them is by cutting them into square bars.

*This post may contain affiliate links. Please read my disclosure for more details!*
Ingredients
There are many recipes and variations for brownies. This is a recipe for a triple chocolate brownie that’s super fudgy and soft, with a beautiful crackly top and packed with chocolate chunks/chips for added texture.
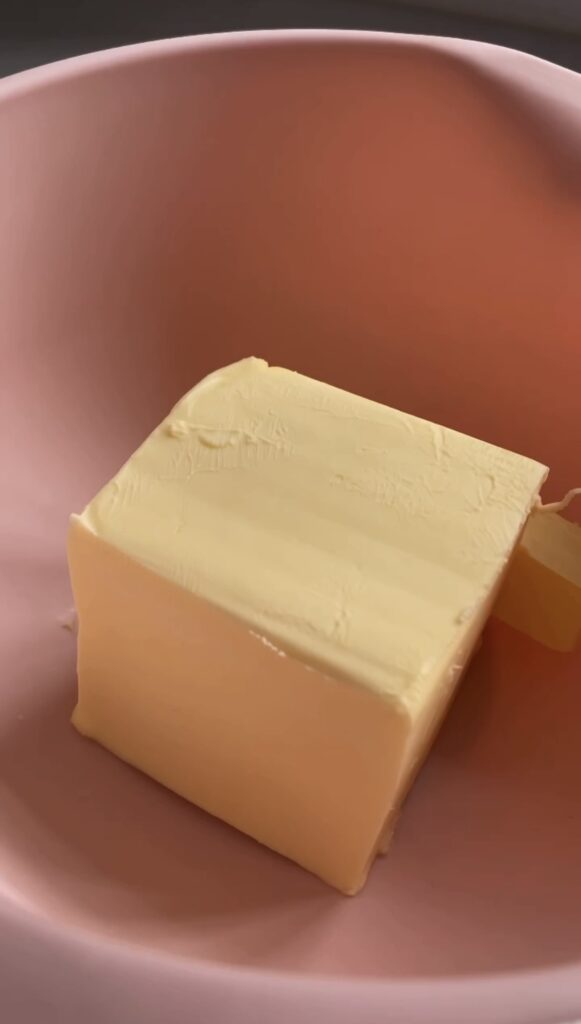
Butter: When making brownies I like to use unsalted butter. Butter helps create that rich, chewy texture, but also helps provide moisture to our brownies.
Chocolate: I like to use semi-sweet dark chocolate for the brownie base, as it’s rich in flavour and pairs well with cocoa powder. However, for the chocolate chips/chunks, you can use any of your favourite chocolates. Just keep in mind if you are using chocolate bars make sure you cut them into small pieces.
Sugar: In this recipe, we use only caster sugar. The sugar is going to help develop that chewy texture, but also provide sweetness to the brownie. You can use brown sugar, however, I find using too much can create an extremely chewy texture, which isn’t the kind of brownie I want to be eating.
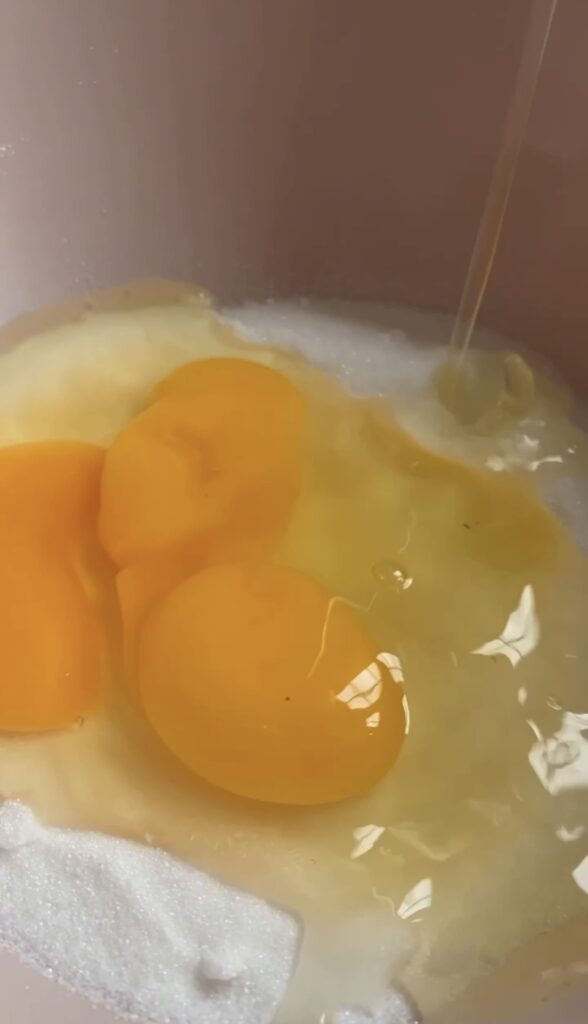
Eggs: This is going to support the brownie structure.
Flour: This recipe uses plain flour. Adding too much flour will create a cake-like texture, so I’d definitely recommend using a measuring scale to measure out all of the ingredients.
Cocoa Powder: Cocoa powder helps intensify the chocolatey flavours, so I like to add a small amount to help boost the chocolate flavour in my brownies.
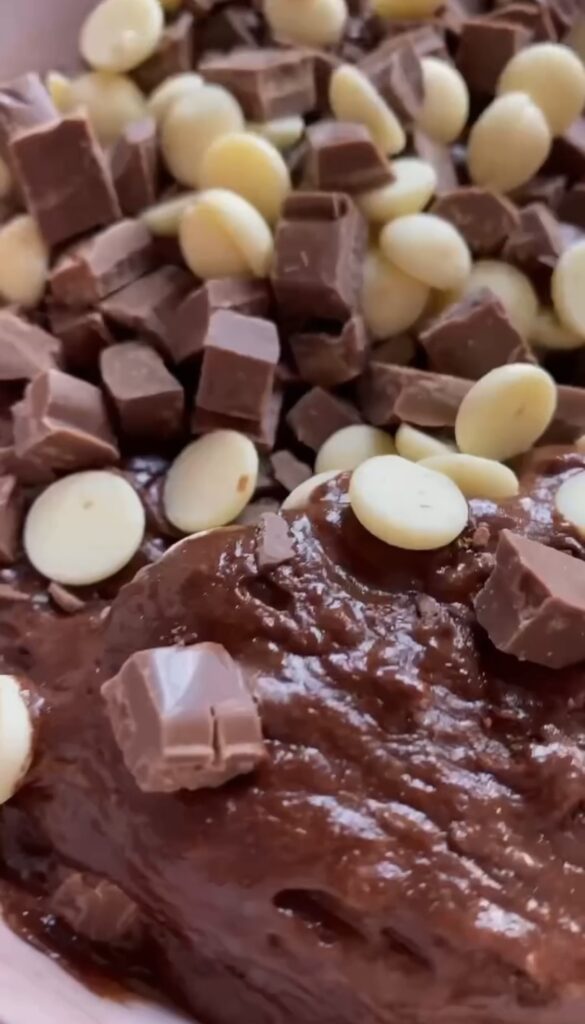
Chocolate Chunks/Chips: For this recipe, I used a combination of white chocolate and milk chocolate bars and sliced them into small chunks. I also used a few dark chocolate chips to balance out the sweetness. If you choose to use chocolate chunks just remember to cut them up small enough so that they distribute evenly throughout the brownies. I like using chocolate chunks because you get beautiful pools of chocolate within the brownie.
How To Make The Brownies?
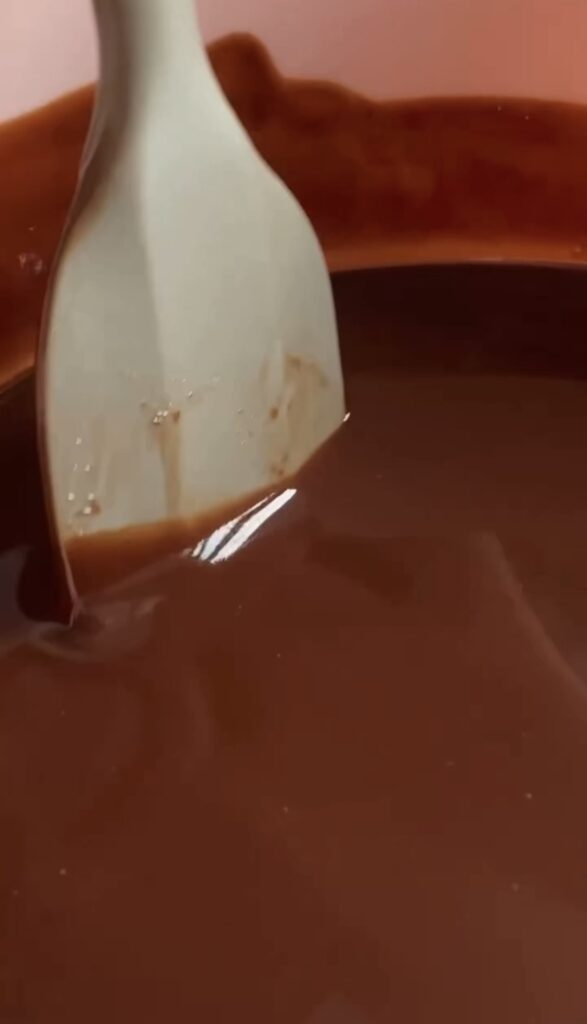
Step 1: To make the brownies start by melting the chocolate and butter.
You can do this by using the microwave and melting the chocolate and butter in short bursts at a time and mixing every 20 seconds to prevent the chocolate from burning. Or you could use a pan and melt the butter and chocolate on low heat, string continuously to prevent the chocolate and butter from burning.
Whisking Technique
I have tried a variety of different methods and techniques, but after experimenting and testing many brownies later, I think I figured out my favourite techniques.
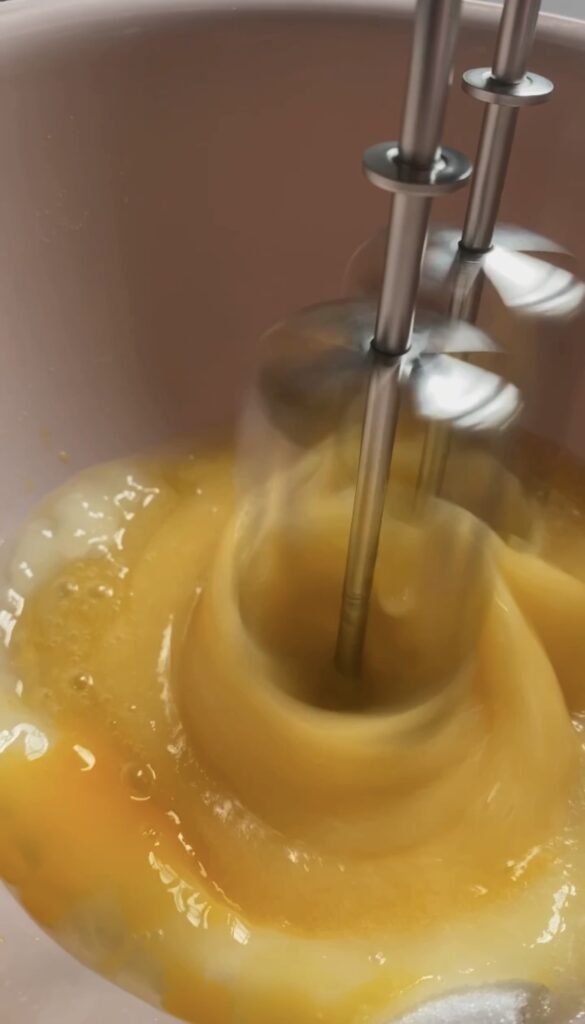
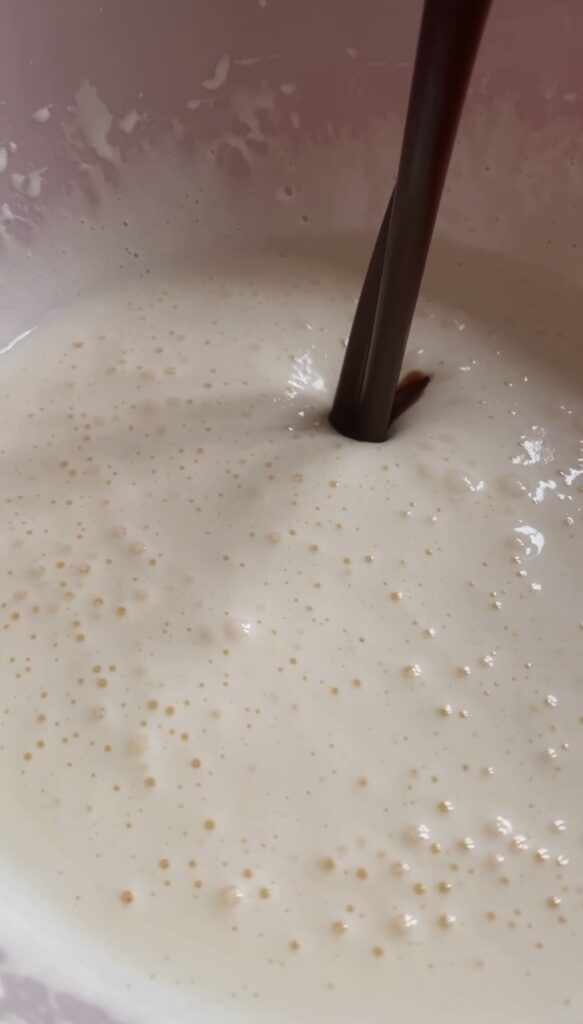
Step 2: Once your chocolate has fully melted, set it aside to cool. While you wait for the chocolate to cool start whisking together the eggs and sugar.
Using the ‘whisking’ technique will help aerate the mixture and help the brownies rise without adding any baking agents, resulting in a beautiful brownie texture. Baking agents can sometimes create a more cake-like brownie, so definitely don’t skip this step.
In this recipe, I used an electric hand whisk. You can use a stand mixer or even a regular whisk, just make sure you whisk those eggs until you have a ‘bubbly frothy’ consistency (this will form those beautiful glossy cracks on top of the brownies).


Adding The Melted Chocolate
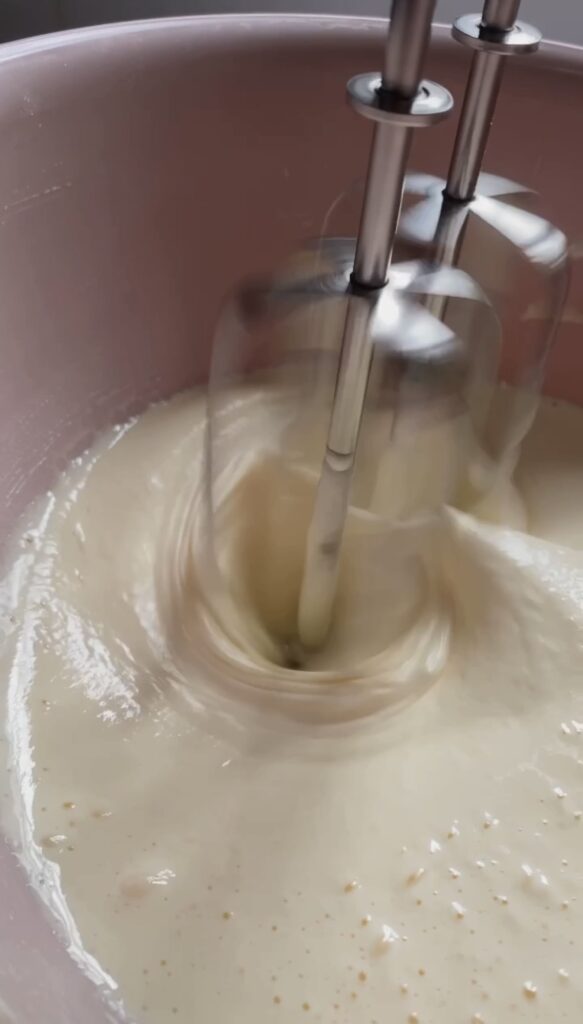
Step 3: Slowly add the melted chocolate to the whisked eggs. Then fold together until evenly combined.
When you add the melted chocolate, make sure the chocolate isn’t too warm, as you will run the risk of scrambling the eggs. So before adding the chocolate make sure it’s cool enough. Take a large spatula and fold in the chocolate using a ‘figure-of-eight’ motion, this will prevent knocking out all of the air made when whisking the eggs.


Adding The Flour
Step 4: Next add the flour and cocoa powder and continue to fold in until just combined. A little flour on the edge of the bowl is fine.
I like to sieve the ingredients before adding them to the bowl, this will help break up any clumps. To mix the dry ingredients I use a large spatula and use the same folding method to combine ingredients. It’s essential that you don’t over-mix, over mixing will create an overly tough brownie.
Step 5: Add in all of your chopped chocolate chunks/chips and continue to fold for a few seconds.
Whenever you add flour to liquid mixtures the gluten proteins will activate, which isn’t a bad thing as it gives baked good structure. However, over-mixing will lead to too much gluten development resulting in tougher baked goods or sometimes extremely chewy bakes. This tip applies to a majority of recipes like brownies.

Baking The Brownies
Step 6: Next it’s time to add the mixture to a 20x20cm square tin lined with parchment paper (greaseproof paper). Parchment paper will make taking the brownies out of the tin so much easier, so I definitely recommend using it as it will save you a lot of time too.
These brownies usually take around 22-25 minutes to bake. However this may vary, so it’s important to keep an eye on them as they bake.
The skewer technique doesn’t work for this recipe as this recipe is super chocolatey. After 22 minutes I like to shake the tray, if the brownie wobbles it needs a little longer, so bake for a further 3 minutes.


Storing Instructions? Serving Suggestions
After the brownies have cooled completely, you can store any leftovers in an airtight container for up to a week.
Once the brownies have fully cooled you can start slicing them. I usually slice my brownies into 16 squares or 12 bars, but you can slice them however you like. They are perfect for a tea-time treat or served as a dessert with whipped cream or your favourite ice cream.

Equipment
For this recipe I used…
- 20×20 cm square tin: If you don’t have this size tin and choose to use a slightly larger or smaller tin or round tin the baking time may vary, so just keep that in mind.
- Parchment paper: This will make taking the brownies out of the tin so much easier
- Silicone spatula: Great for folding/mixing ingredients and scraping down the edges of the bowl to make sure everything is well combined.
- Mixing bowls: Any bowl, that’s large enough will work.
If you like my chocolate recipes you may also like…

Triple Chocolate Brownies
Description
The best triple chocolate brownie recipe ever. Rich, gooey and extra chocolatey. They're super easy to make and taste incredible.
Ingredients
Instructions
-
Melt butter and dark chocolate together (in a pan over low heat or in the microwave in 20second intervals), stirring each time to prevent the chocolate from burning. Once fully melted set aside and allow to cool.
-
In a separate bowl whisk eggs and sugar until frothy and light in colour for 3-5 minutes.
-
Preheat oven to 160C Fan.
-
Slowly pour in the melted chocolate over the whisked egg mixture. Then using a large spatula fold in until fully combined (Make sure the chocolate mixture isn’t to warm- you don’t want to cook the eggs).
-
Add the sifted flour and cocoa powder to the bowl and repeat the folding process until just combined.
-
Add the chocolate chunks/chips and fold through.
-
Pour mixture in a 20x20cm tin and level with offset spatula.
-
Bake in the oven for 22-25minutes. The brownie shouldn’t wobble, but should still be soft and gooey.
-
Allow the brownies to cool and set fully in the tin before slicing. (To get perfectly even neat slices I’d recommend leaving in the fridge for 30-45 minutes at least.
-
Once set lift out of tin and cut into 16 squares.
-
Store in an airtight container to maintain freshness or enjoy.
Note
- If you are struggling to create neat slices, try leaving the brownies in the fridge for a few minutes to firm up.
- After the brownies have baked allow them to cool fully in the tin, before attempting to slice them.

