
If you’re planning to make any sweet treats this Easter, you have to try this recipe. It’s so simple to make and requires only a few simple steps.
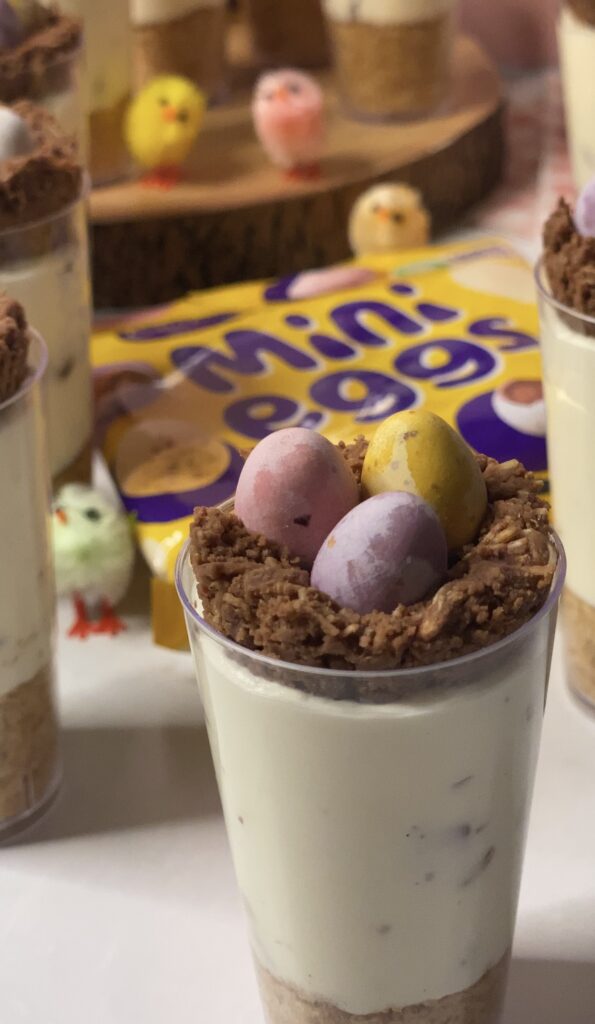
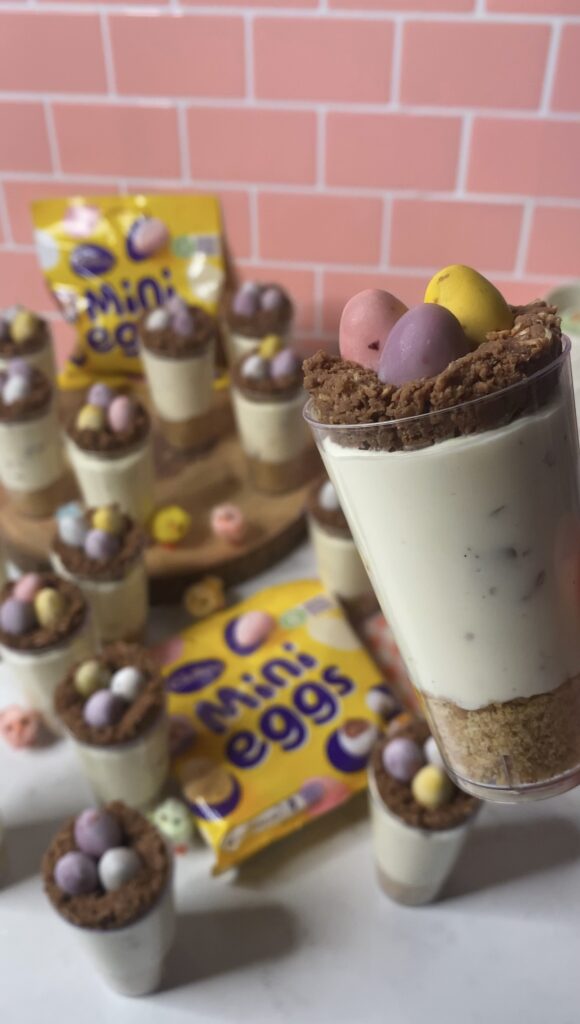
Each cup has a delicious biscuit layer at the bottom, which is then filled with a mini egg cheesecake filling and then finally decorated with these delightful homemade easter nests.
*This post may contain affiliate links. Please read my disclosure for more details!*
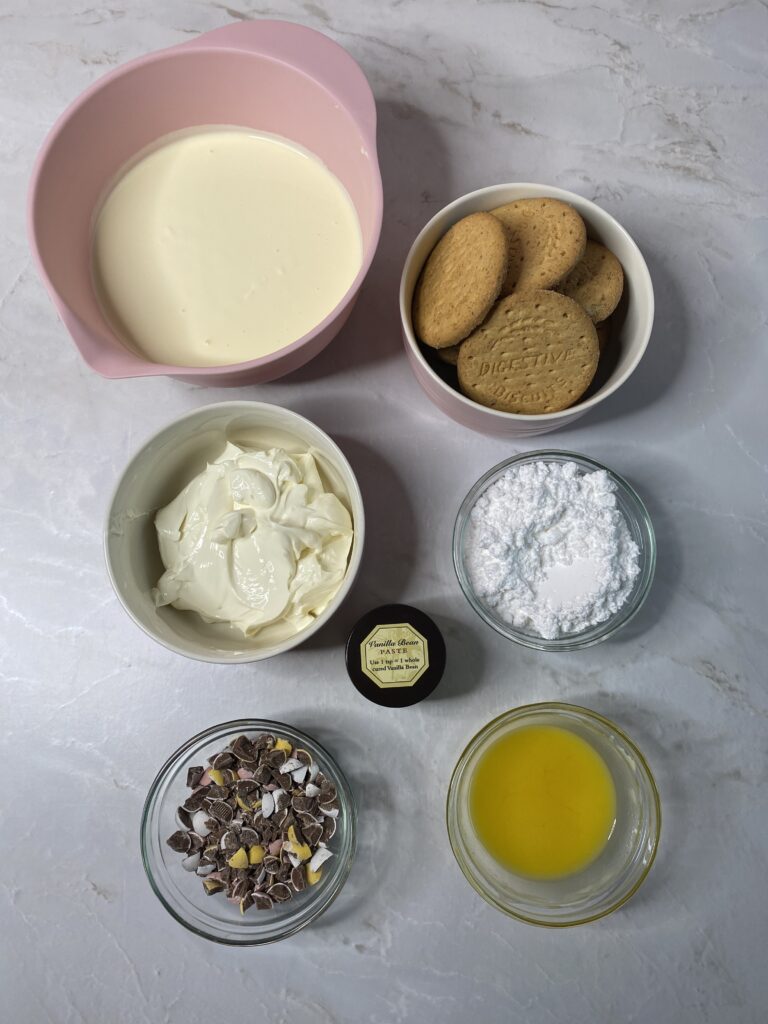
Ingredients To Make The Cheesecakes
Biscuits: I used digestives. But you can really use any biscuit you like. For example, I’ve tried using chocolate chip cookies in my Kinder Bueno Cheesecakes and they tasted amazing.
Butter: You can use either butter or baking spread, both work just fine.
Double Cream: In some places, it’s called ‘Heavy Cream’. It’s a thick cream that has a higher fat content, which helps stabilise the cheesecake filling as well as make the dessert super light and creamy.
Cream Cheese: In the UK we don’t have blocks of cream cheese, but we do have soft cream cheese. Whenever I open a pack I pour off any excess liquids, this will ensure the cheesecakes are set properly. My favourite brands are Philadelphia, Aldi’s own Brand and Lidl’s own brand because they don’t have too many extra liquids.
Icing Sugar: This will help sweeten the cheesecake filling.
Vanilla Bean Paste: Mini eggs have a strong sweet vanilla smell when you first open a pack. So I decided to use vanilla bean paste because it’s a little bit stronger than extract. Also, vanilla bean paste leaves beautiful speckles in the cheesecake too. If you don’t have paste you can use still use extract.
Mini Chocolate Eggs: I used Cadbury Mini eggs, but any chocolate mini eggs should work.
To decorate the cheesecakes I used Mini chocolate nests because they fit perfectly inside each dessert cup. Click here for the Chocolate Mini Egg Nest recipe.
Recommended Equipment:
Dessert Cups: I used 3oz round cups. They’re the perfect size for recipes like this.
Piping bag: The easiest way to add the cheesecake mixture to each dessert cup is by using a large piping bag. Make sure the piping bag is good quality because you don’t want the mixture to burst out the sides of the bag.
Food Processor or Rolling Pin: The rolling pin makes crushing biscuits so fun and satisfying, because of the flat edge. If you decide to upscale up the recipe you can use a food processor to crush the biscuits too.
Electric whisk or Stand Mixer: To ensure the cheesecake is light and airy I’d recommend using an electric whisk or a stand mixer.
Measuring Spoons: For measuring out small amounts of ingredients. I also like to use them to equally divide the biscuits between each dessert cup.
Kitchen Scale: Although I provide cup measurements, it’s better to use a measuring scale for more accurate results. Digital scales provide the most accurate reading, therefore making it the most efficient way to measure out your ingredients.
Spatula: To ensure all of the ingredients are incorporated well, I use a large spatula to scrape the side of the bowl.

Top Tips For Making The Perfect Cheesecake Cups!
When pressing down the biscuits use another cup to push the biscuits down. This will help create a perfectly flat layer.
Make sure your cream cheese is at room temperature because cold cream cheese doesn’t combine very well with other ingredients. One time I was making cream cheese frosting and I used cold cream cheese. My frosting ended up with tonnes of lumps and the texture wasn’t very nice when I was spreading it on my cake. Let’s just say I’ve learnt from my mistakes for sure.
Make sure the double cream is cold. If the cream is too warm the fats in the cream will not emulsify, preventing the cream from holding the air particles. The air particles create those beautiful soft peaks.
When it’s summer I like to leave the bowl in the fridge to prevent the cream from going warm
After piping the cheesecake mixture into each cup, tap the dessert cups on a flat surface to help push out any air bubbles.
Troubleshooting
If you have any questions in regards to baking feel free to message me on Instagram @sabsbakes and I will try my best to get back to you as soon as possible.

Mini Egg Cheesecake Cups
Description
Easy no-bake mini egg cheesecakes perfect for the Easter holidays. Each cup is filled with a Mini Egg flavoured cheesecake. Then topped with beautiful Mini Egg filled nests.
Ingredients
Biscuit Base
Cheesecake
Decorations
Instructions
-
Start by crushing the biscuits into fine crumbs using a rolling pin or food processor.
-
Pour in the melted butter and mix until all of the biscuit crumbs are fully coated.
-
Add around 3 tablespoons of the biscuit mixture into each cup. Then using another dessert cup, squish the biscuit layer flat (makes 16 cups). Once done set each cup aside.
-
In a bowl whisk cream cheese, icing sugar and vanilla paste until smooth.
-
Pour in the double cream. Then continue to whisk until the mixture starts to form stiff peaks.
-
Add the crushed mini eggs and fold them in using a spatula.
-
Next, add the mixture to a large piping bag. Then pipe equal amounts of filling into each cup (make sure you leave room for decorations).
-
Once each cup is filled tap each cup on a flat surface to push out any large air bubbles.
-
Next add 1 mini chocolate easter nest on top of each cup.
-
After decorating, place the cheesecakes in the fridge to firm for at least 3 hours.
-
Once set enjoy. These cheesecakes will last up to 3 days in the fridge.
Note
When serving I’d recommend leaving the cheesecakes out for a few minutes so that the decorations aren’t too hard when you eat them.