
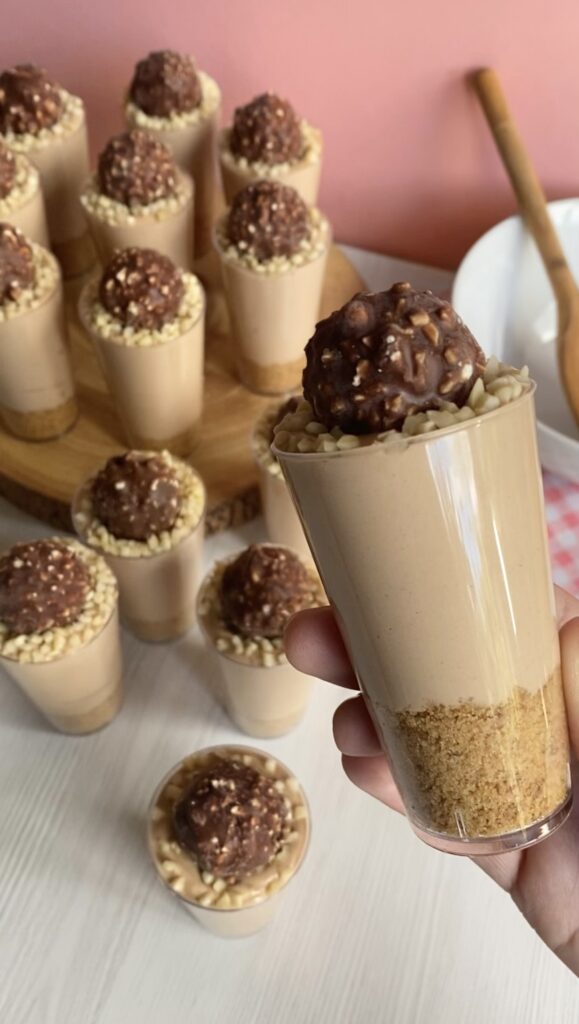
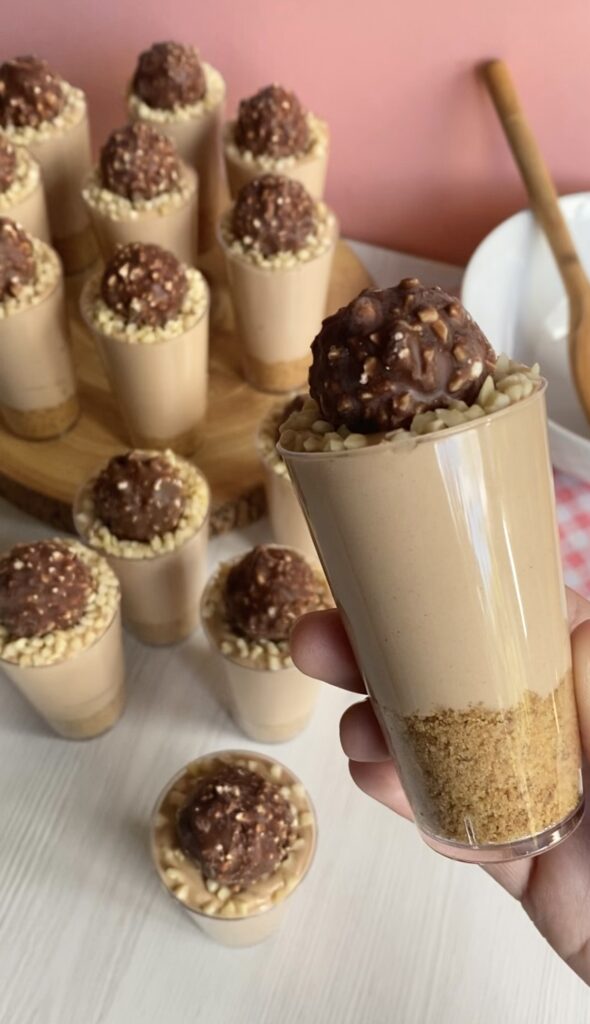
Let’s start with a ‘Ferrero Rocher Cheesecake Cup Recipe’. This is one of my most popular recipes and for a good reason. It’s a simple recipe with a soft buttery biscuit base, a chocolate hazelnut cheesecake filling, topped with chopped almonds, and a Ferrero Rocher. My favourite part about this recipe is that individual dessert cups are fantastic for parties and events because they’re easy to serve, but also look good.


*This post may contain affiliate links. Please read my disclosure for more details!*
If you like this No-bake Dessert cups series you may also like…
- Strawberry Cheesecake Cups
- Biscoff Cheesecake Cups
- Strawberry Milkshake Cheesecake Cups
- Easy Chocolate Moose Dessert Cups
What is a Ferrero Rocher?
What is a Ferrero Rocher you may ask? Well, it’s a confectionery which consists of a whole hazelnut with praline filling in a round wafer shell, which is coated in milk chocolate and chopped hazelnuts. Ferrero Rocher’s are pretty much available in almost every supermarket.
So I didn’t really know much about the history of Ferrero Rocher’s until now, I knew they taste good, but I didn’t know much about the brand itself so I decided to do a little research and I’ve got to say it’s quite interesting, the amount of chocolate they make per day is insane.
Ok, let’s get into making the Ferrero Rocher Cheesecake Cups…
Making the Biscuit Base
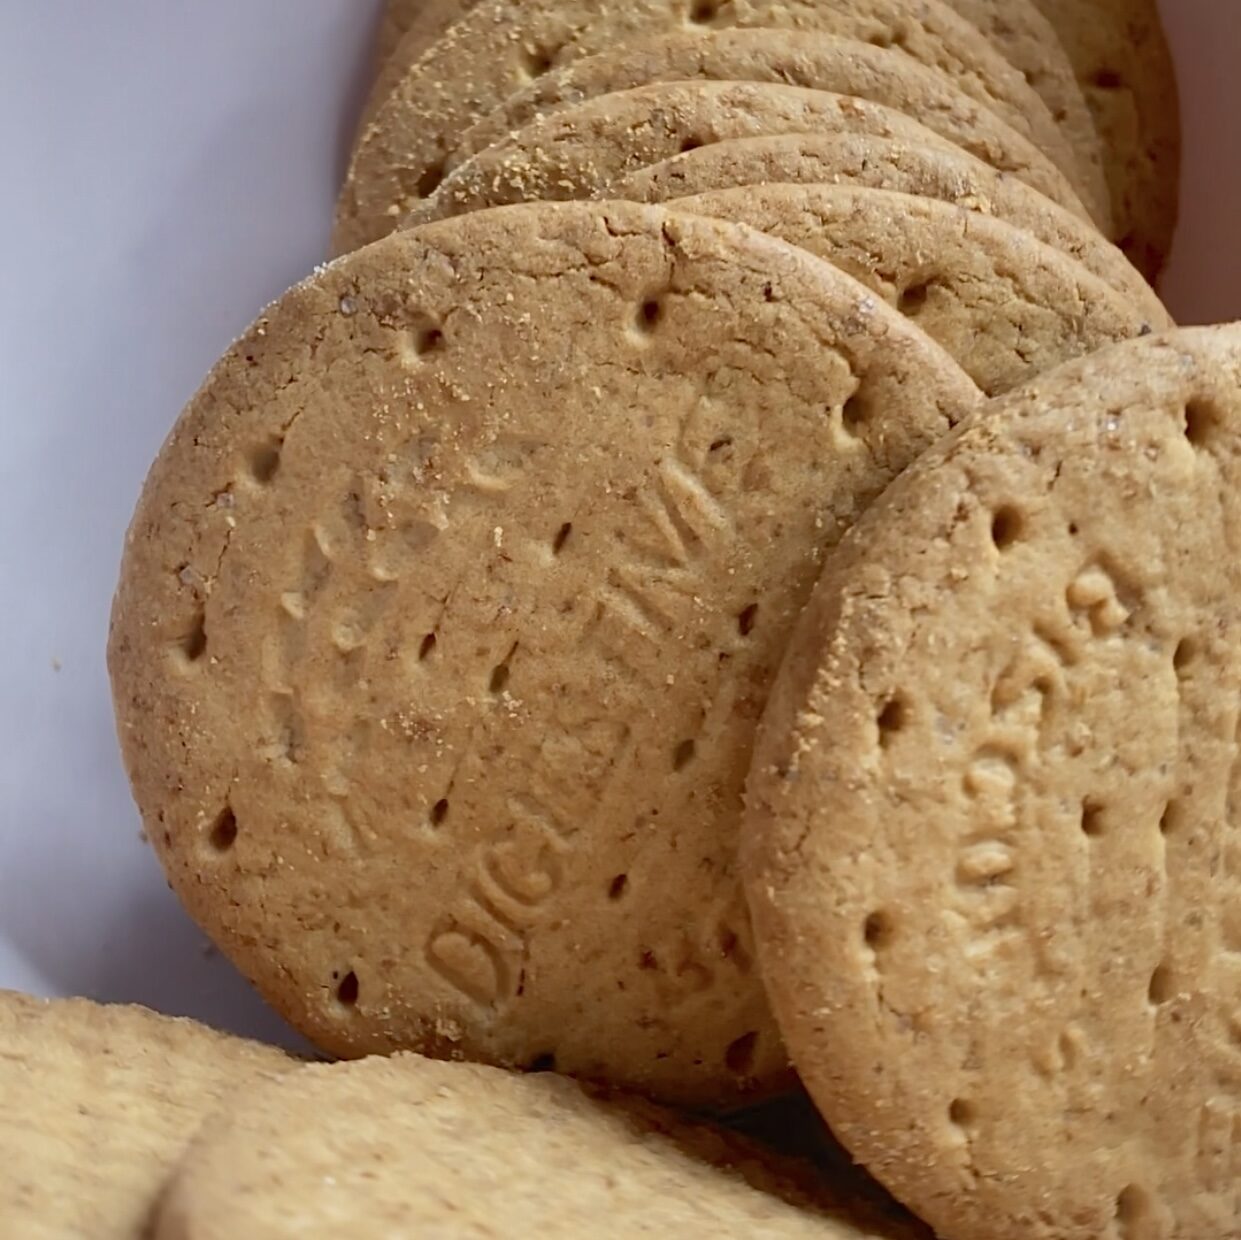
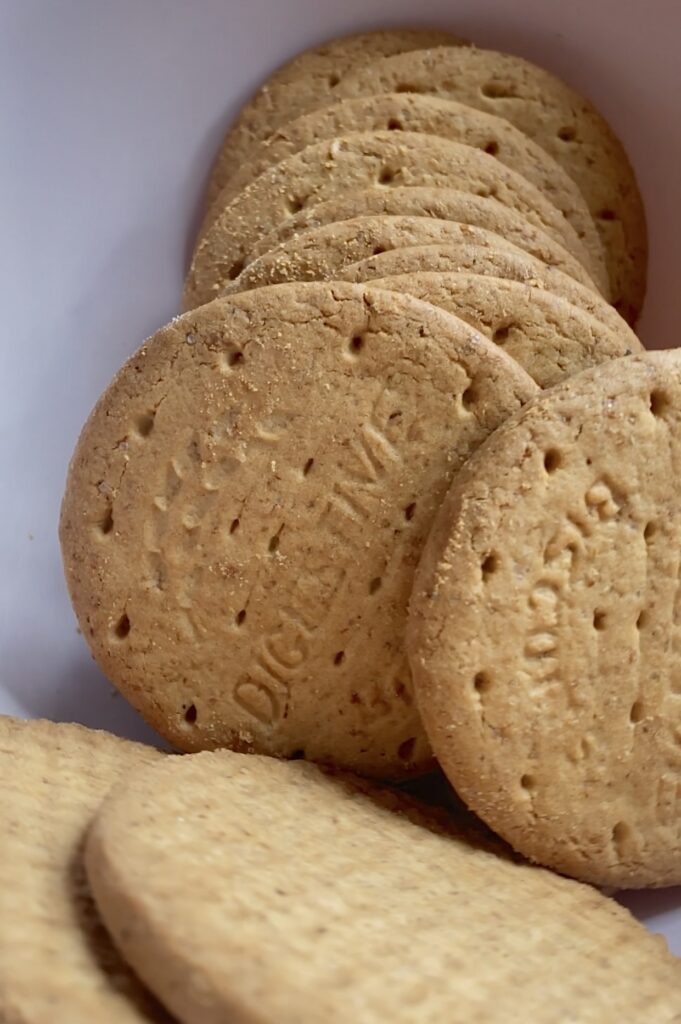
Before making the cheesecake filling I like to prepare my biscuit base. This also gives the biscuits time to set before you start constructing the dessert cups. For this recipe, the base only requires 2 ingredients. This includes digestive biscuits and a few teaspoons of melted butter.
Step 1: Begin by adding your biscuits to a large bowl. Using a rolling pin crush up the biscuits into fine crumbs.
When making the biscuit base you want the biscuits to be crushed into fine crumbs. This is important if you want to achieve a perfectly flat level in the cups. The quickest way to do this is by using a food processor, however, I understand not everyone has one. So another way is to use a rolling pin- If you watch my videos you may have noticed I like using my fondant rolling pin for this specific task as it has a perfectly flat end making it super easy to crush biscuits.
Tip: If you decide to increase the recipe quantities, I’d definitely recommend using a food processor as it may take a little longer depending on how many biscuits you have.
Step 2: The next step is to add the melted butter.
With dessert cups, the amount of butter you use for the base will be less in comparison to a regular cheesecake biscuit base. This is because a regular cheesecake base needs to be solid and hold its structure when taken out of the tin. However, if you put the same ratio of butter to biscuit in a dessert cup, the chances of the biscuit base being stuck at the bottom will be increased making the dessert difficult to eat.
Dessert Cups
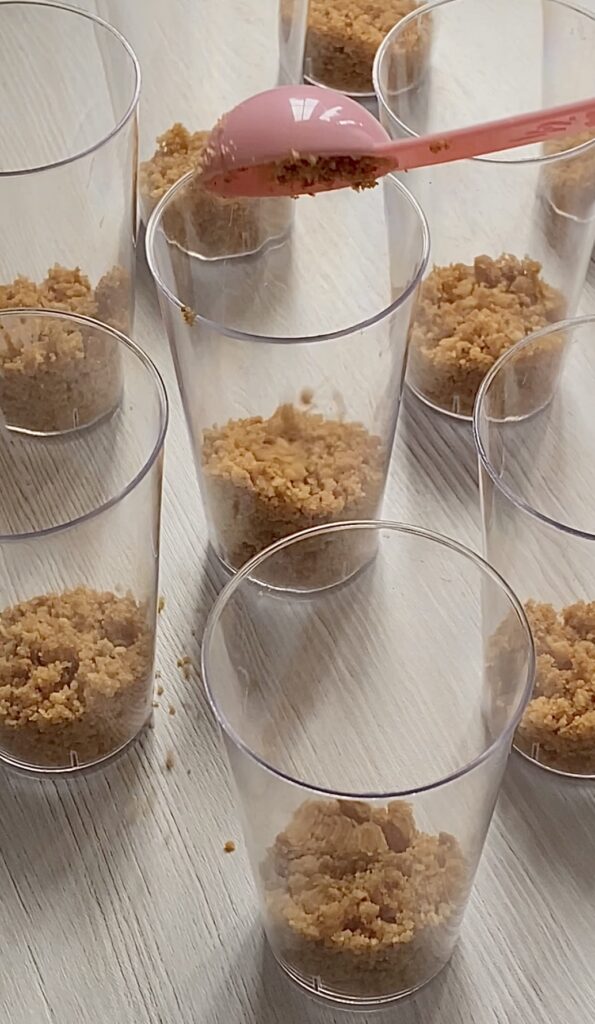
Dessert Cups come in a variety of sizes and shapes, some are slightly bigger, while some are slightly smaller- I guess it depends on what specific type of dessert you’re making. For this specific recipe, 3oz round cups work well as it provides the perfect serving size. However feel free to use whatever size dessert cups you like, it’s entirely up to you.
Adding The Biscuits to the Cups
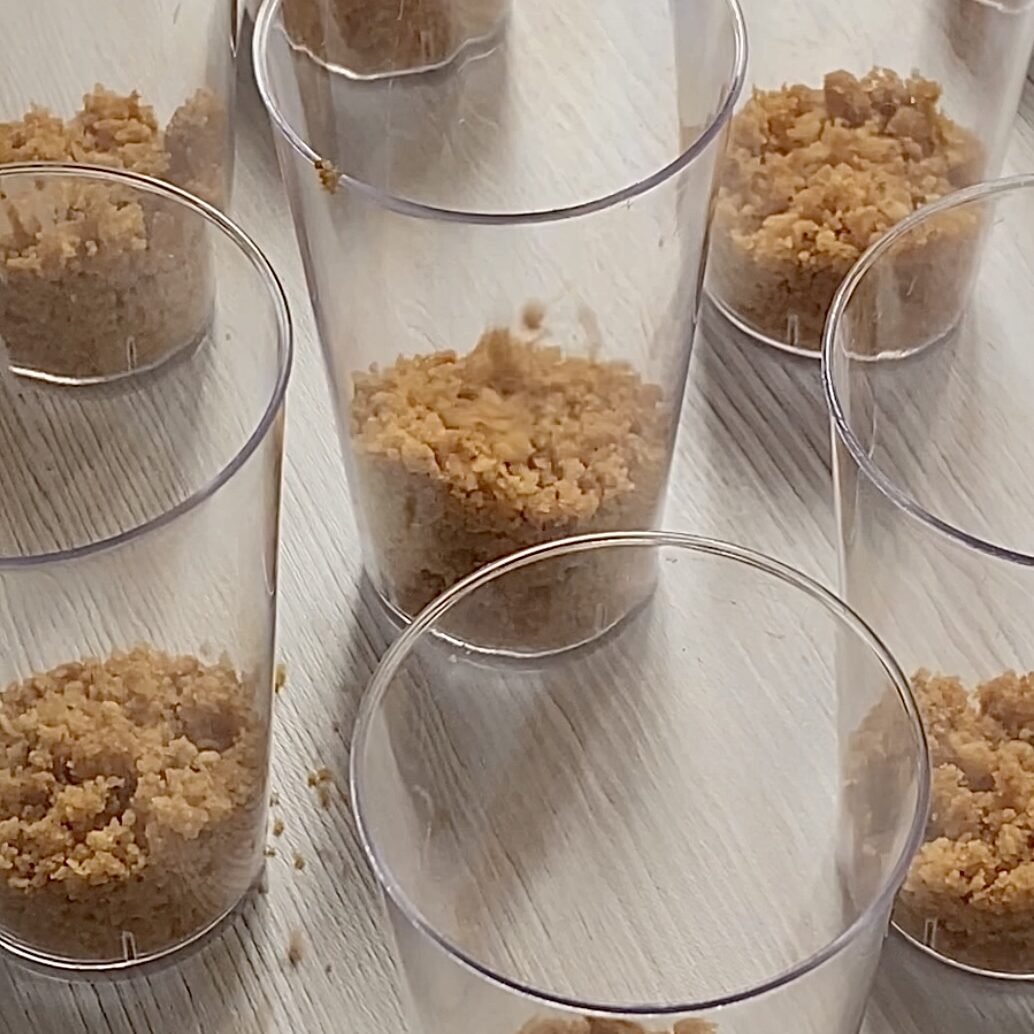
Step 3: Add around 2-3tsp of crushed biscuits to each dessert cup.
This recipe makes around 16 dessert cups, however, this may change if you are using a different size dessert cup so keep that in mind. The easiest way to distribute the biscuit mixture evenly is to use measuring spoons. In this recipe, I added 2-3tsp of biscuits in each cup.
Once you have added the biscuits to each cup it is time to press the biscuits flat. The easiest way to achieve this is by using another dessert cup the same size, it will ensure the edges are pressed evenly making the overall presentation look amazing.
Making Cheesecake Filling
When it comes to making the cheesecake filling don’t be tempted to substitute the cream cheese and double cream for lower-fat alternatives. The results won’t be the same as the fat content in these ingredients will help the cheesecake set.
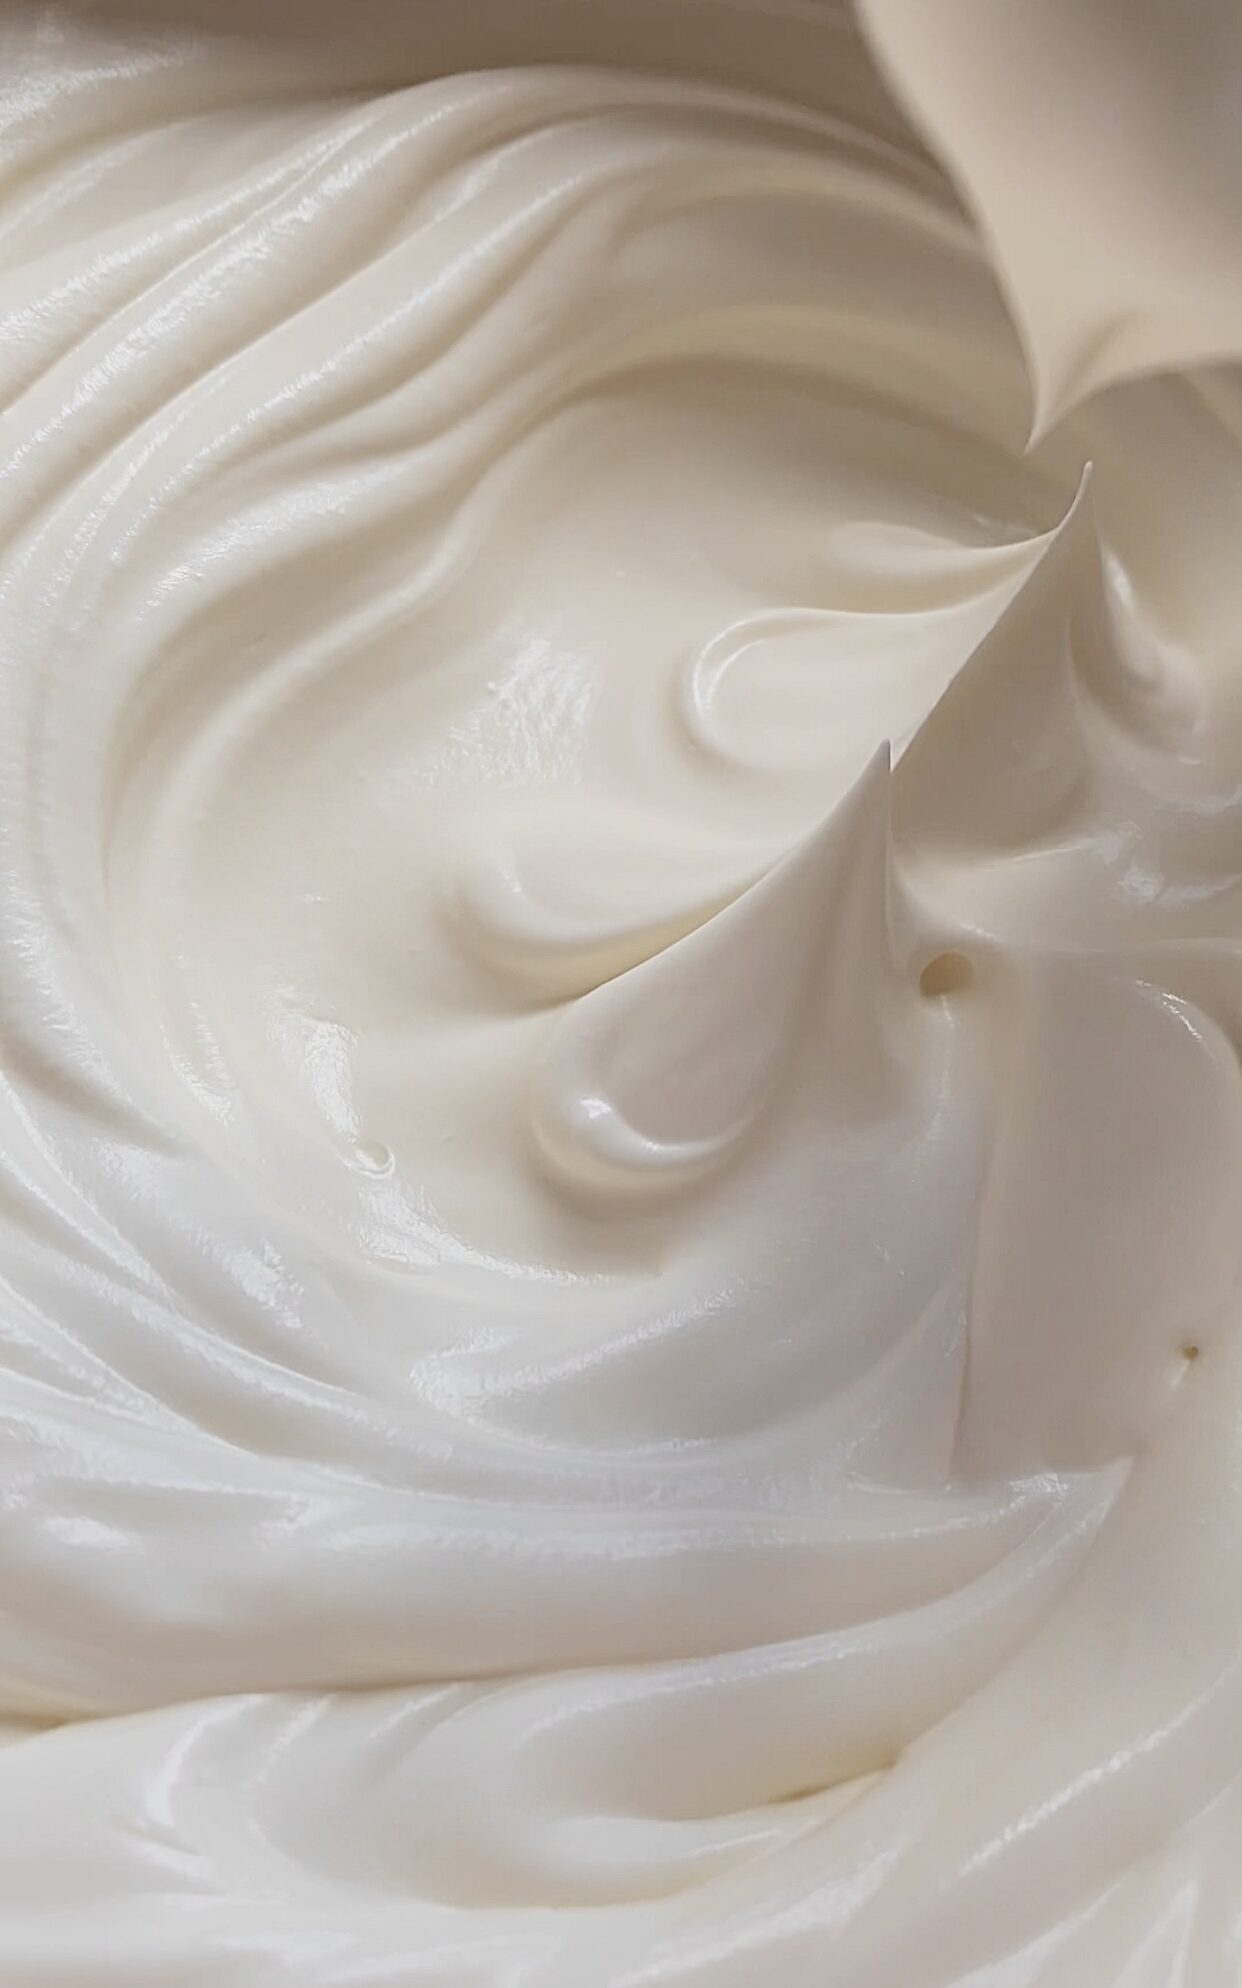
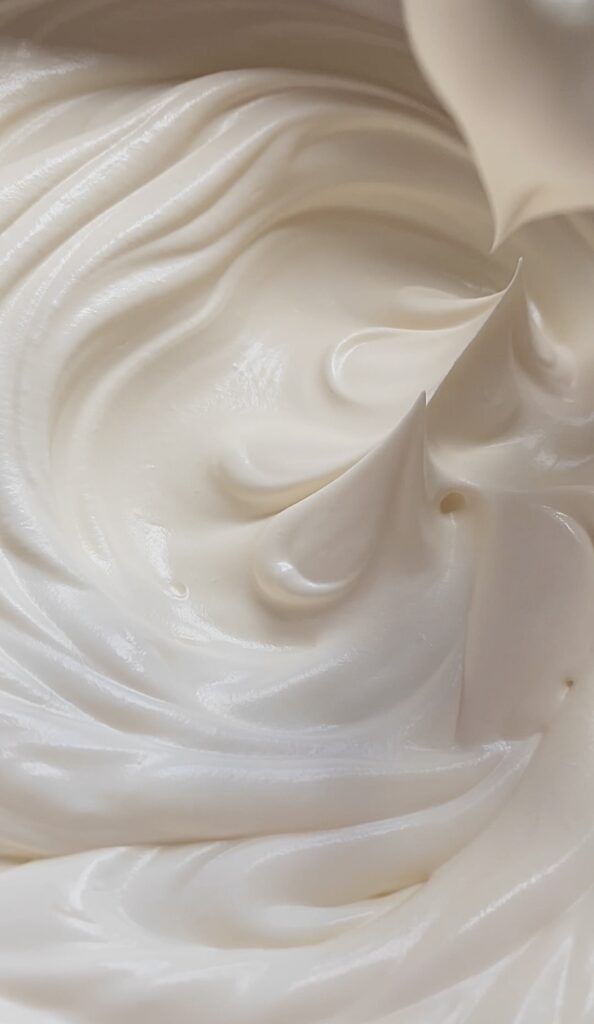
Step 4: In a large bowl whisk the double cream (heavy cream) to soft peaks using an electric whisk.
Tip: Make sure the double cream is cold, this is because warm double cream will not form soft peaks. When it’s summer I like to leave the bowl in the fridge to prevent the cream from going warm
Step 5: Once the cream has formed soft peaks it is time to add in the cream cheese and icing sugar. Then whisk for a few seconds until the cream cheese is well incorporated.
- Make sure your cream cheese is ROOM-TEMPERATURE because cold cream cheese doesn’t blend well. This will prevent the cheesecake from going grainy.
Try to avoid over-mixing as this could cause the cheesecake filling to become a little runnier, making it difficult to pipe later on. To achieve a delicious creamy cheesecake it is important that this step is taken into consideration.
Adding The Chocolate
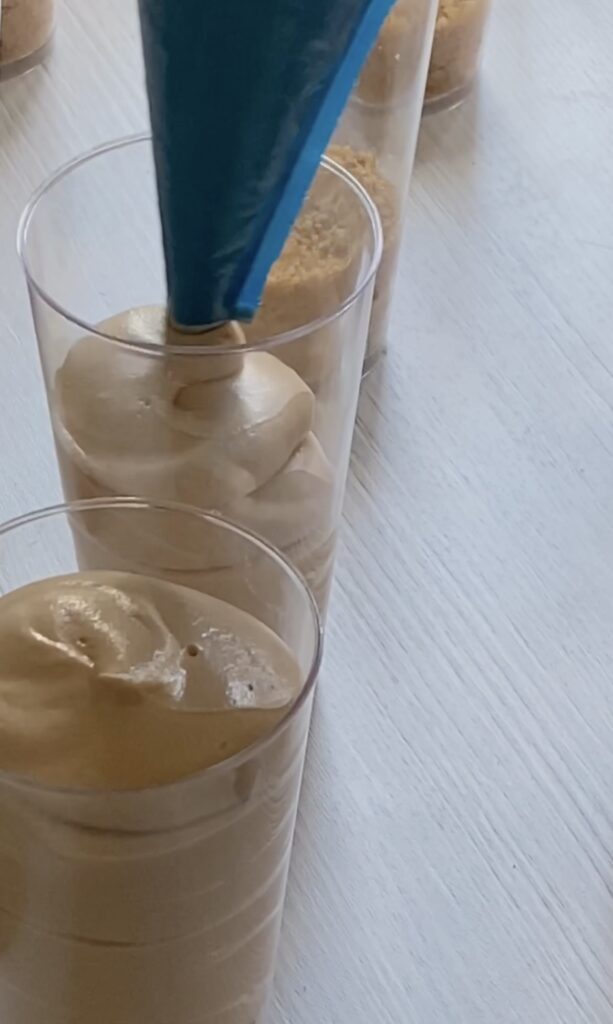
Step 6: It is now time to add the yummy chocolate flavour. For this recipe, I used Chocolate Hazelnut Spread in this recipe to create a delicious hazelnut flavour. You can use ‘Nutella’ or even Supermarket Own brands.
After adding the chocolate spread I like to use a large spatula to fold in the spread, this will prevent knocking out any of the air created when whipping up the cream.
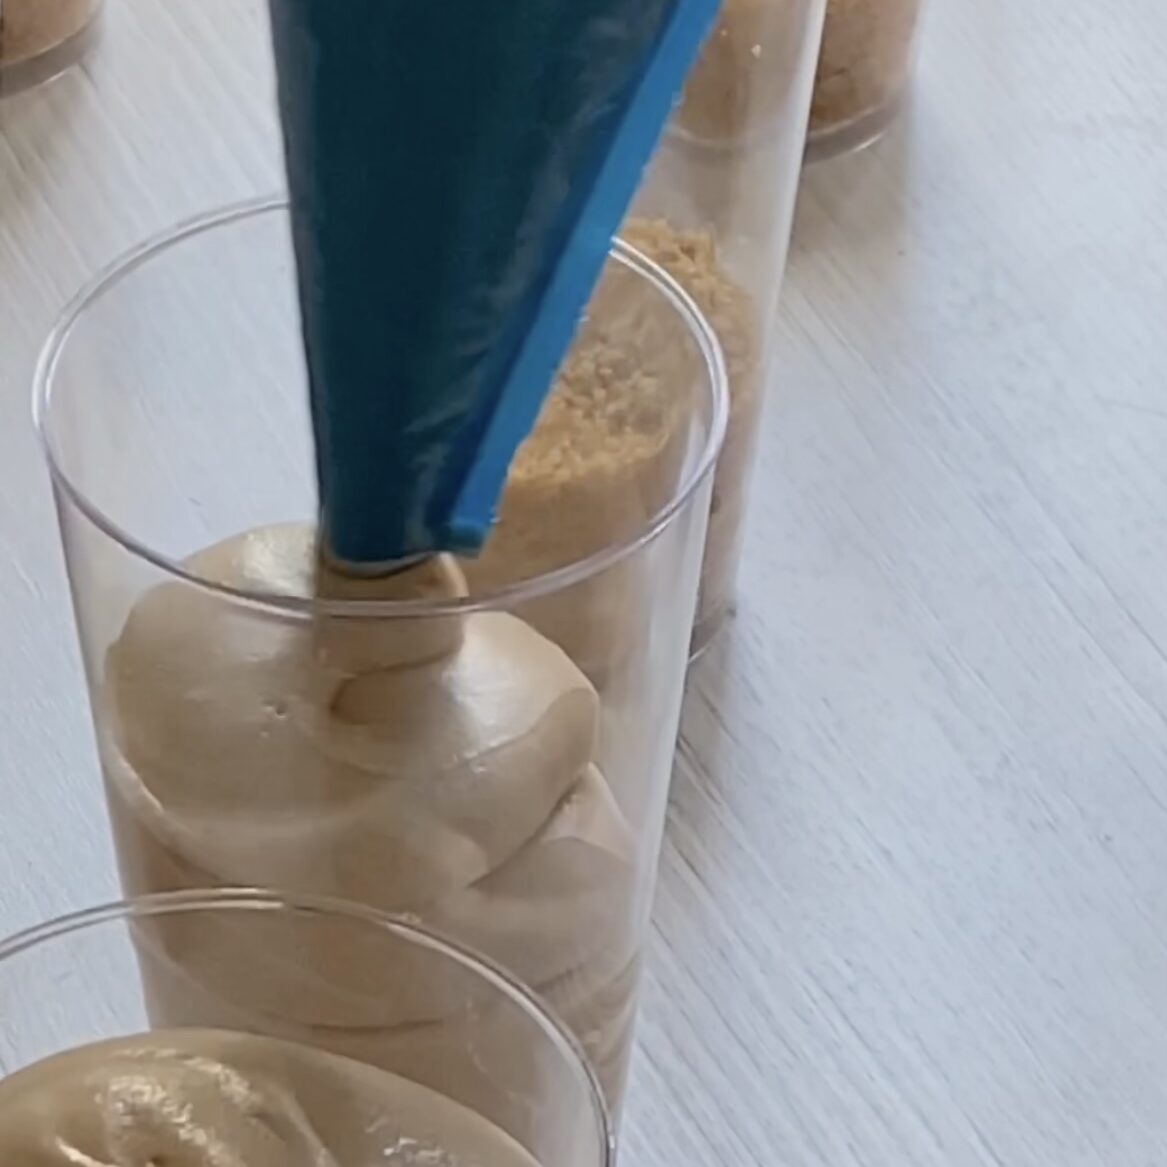
Once the cheesecake filling is complete I’d recommend adding the mixture to a large piping bag. This makes it really easy to pipe into each individual cup and saves a lot of time.
Decorating The Cheesecakes
The cheesecakes are almost ready! All we need to do is fill and decorate each cup.
Once you have piped the cheesecake filling into each cup I like to tap the cups on a flat surface. This will push out any air bubbles making the cheesecakes look creamy and smooth.
For the decorations I used…
•Chopped Almonds
•Ferrero Rochers
You can even toast the almonds for a few seconds on a pan until lightly toasted. This will help enhance the flavours and textures (just make sure you allow the almonds to cool down before decorating- but don’t forget to transfer the almonds to a bowl to prevent further cooking, as you wait for them to cool down.
Top Tips For Making The Perfect Cheesecake Cups!
- When pressing down the biscuit base use another cup to push the biscuits down. This will help create a perfectly flat layer, making the overall presentation look amazing.
- After adding the chocolate spread switch to using a spatula, then fold the ingredients together until combined. This will prevent knocking any air created when whisking the cream.
- After piping the cheesecake filling tap the dessert cups on a flat surface, this will help push out any air bubbles.

Ferrero Rocher Cheesecake Cups
Description
A simple fun and easy dessert to serve when you’re short on time, but still want to impress your friends and family.
Ingredients
Biscuit Base
Cheesecake
Decorations
Instructions
-
Start by crushing all of the digestive biscuits into fine crumbs (using a food processor or rolling pin).
-
Melt the butter in the microwave for a few seconds until fully melted.
-
Add the melted butter to the crushed biscuits and mix to form a wet sand mixture.
-
Then add around 3tbsp of the crushed biscuits into each dessert cup (This recipe makes 16 dessert cups).
-
Press the biscuits using another dessert cup to create a perfectly flat base for the cheesecake filling.
-
In a large bowl whisk the double cream using an electric whisk, until stiff peaks form.
-
In another bowl mix together the cream cheese and icing sugar until fully combined.
-
Then add to the double cream and whisk until well incorporated.
-
Next add the ‘chocolate spread’ and fold in using a large spatula to prevent pushing out all the air created when whipping the cream.
-
Once fully combined add the cheesecake filling to a large piping bag.
-
Pipe the mixture into each cup. Then tap the cups on a flat surface to push out any air bubbles.
-
Sprinkle on the chopped hazelnuts.
-
Place 1 Ferrero Rocher on each cheesecake.
-
Place in the fridge to chill for at least 3 hours.
-
Once chilled enjoy
Note
Before you start making the cheesecakes, the cream cheese should be at room temperature, but the double cream should be cold.

