
Now initially I wasn’t a hundred per cent sure whether to call this recipe a moose. This is because REAL chocolate moose requires whisking egg white to stiff peaks. I would say this recipe is more like chocolate whipping cream but falls under the moose category because of how light and airy it is.
Anyway apart from all of that, this recipe is super easy to make it requires no baking and tastes absolutely incredible. I’m confident you will enjoy this recipe as much as I do.
*This post may contain affiliate links. Please read my disclosure for more details!*
If you like this No-bake Dessert cups series you may also like…
- Ferrero Rocher Cheesecake Cups
- Strawberry Cheesecake Cups
- Biscoff Cheesecake Cups
- Strawberry Milkshake Cheesecake Cups
Ok, let’s get into making these delicious Chocolate Moose Cups!
Making the Biscuit Base
To make the biscuit base this recipe requires 2 ingredients, Oreos and a few teaspoons of melted unsalted butter.
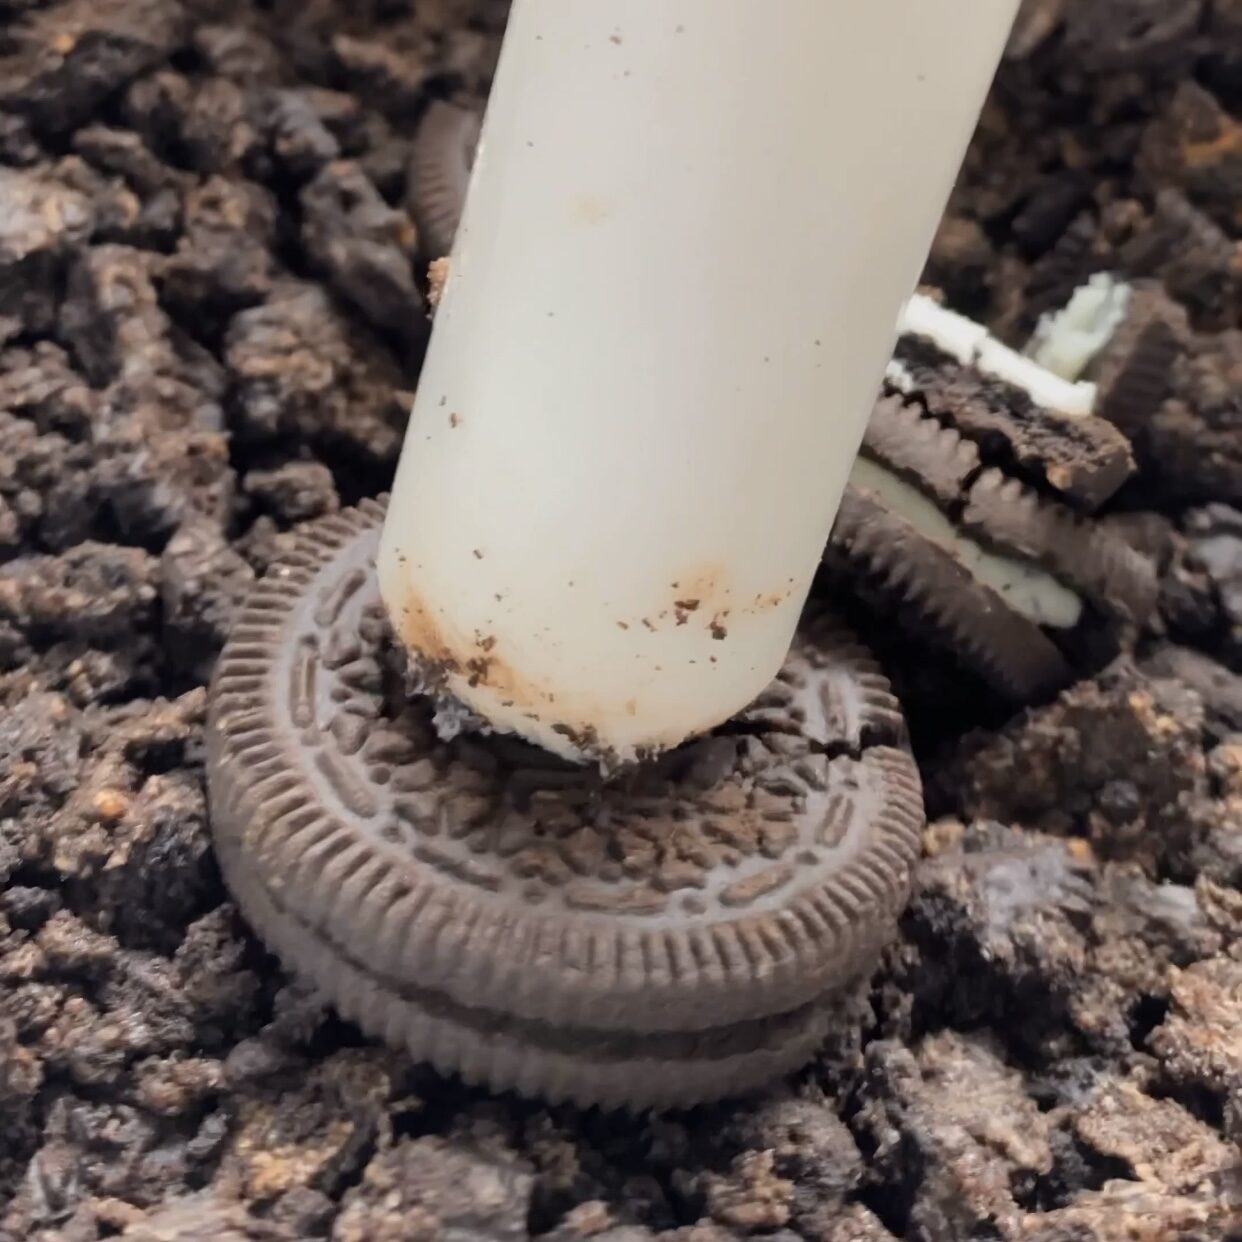
Step 1: Crush the Oreos into fine crumbs using a food processor or rolling pin.
For this recipe, I used my fondant rolling pin because it works perfectly for crushing biscuits because of the flat edge. I think I’ve used this rolling pin more for crushing biscuits than I have used it for rolling out fondant. If you are multiplying the recipe you may want to use a food processor as it will save you a lot more time, but because it is only a few biscuits in this recipe it doesn’t take too long plus it saves me washing up a tonne of dishes later.
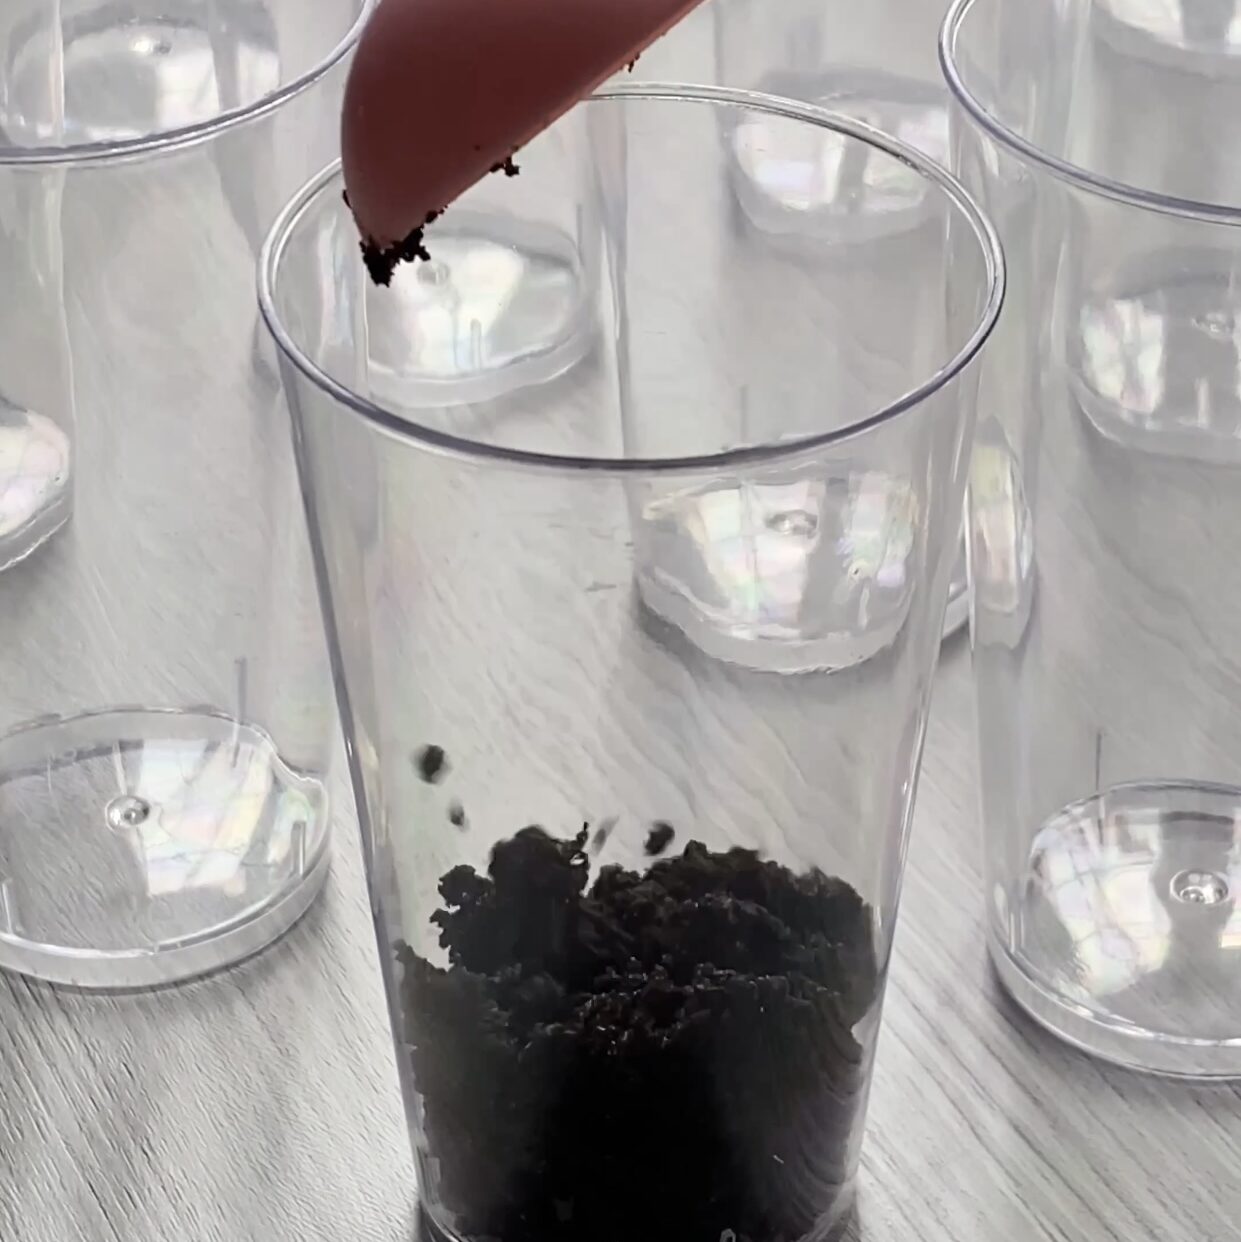
Adding the Biscuit to the Dessert Cups
For this recipe, I decide to use 3oz Dessert Cups. You can choose any cup design you like. When adding the biscuits I like to use measuring spoons, this way I can evenly distribute the biscuits into each dessert cup.
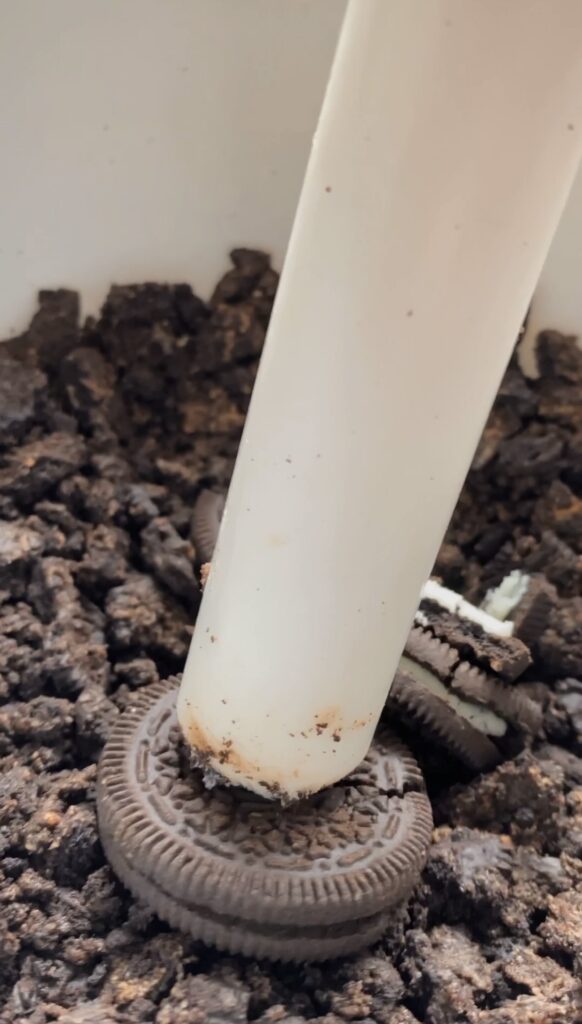
Step 2: Once you have added the biscuit to each cup it is time to press the biscuits firmly to create a flat base ready for the moose filling.
The easiest way to achieve this step is by using another dessert cup and pressing it into the cup with the biscuits. It’s important to push the biscuit base flat because it will prevent the filling from blending with the biscuit layer.
Making the Chocolate Moose
Now it’s time to make the yummiest chocolate moose.
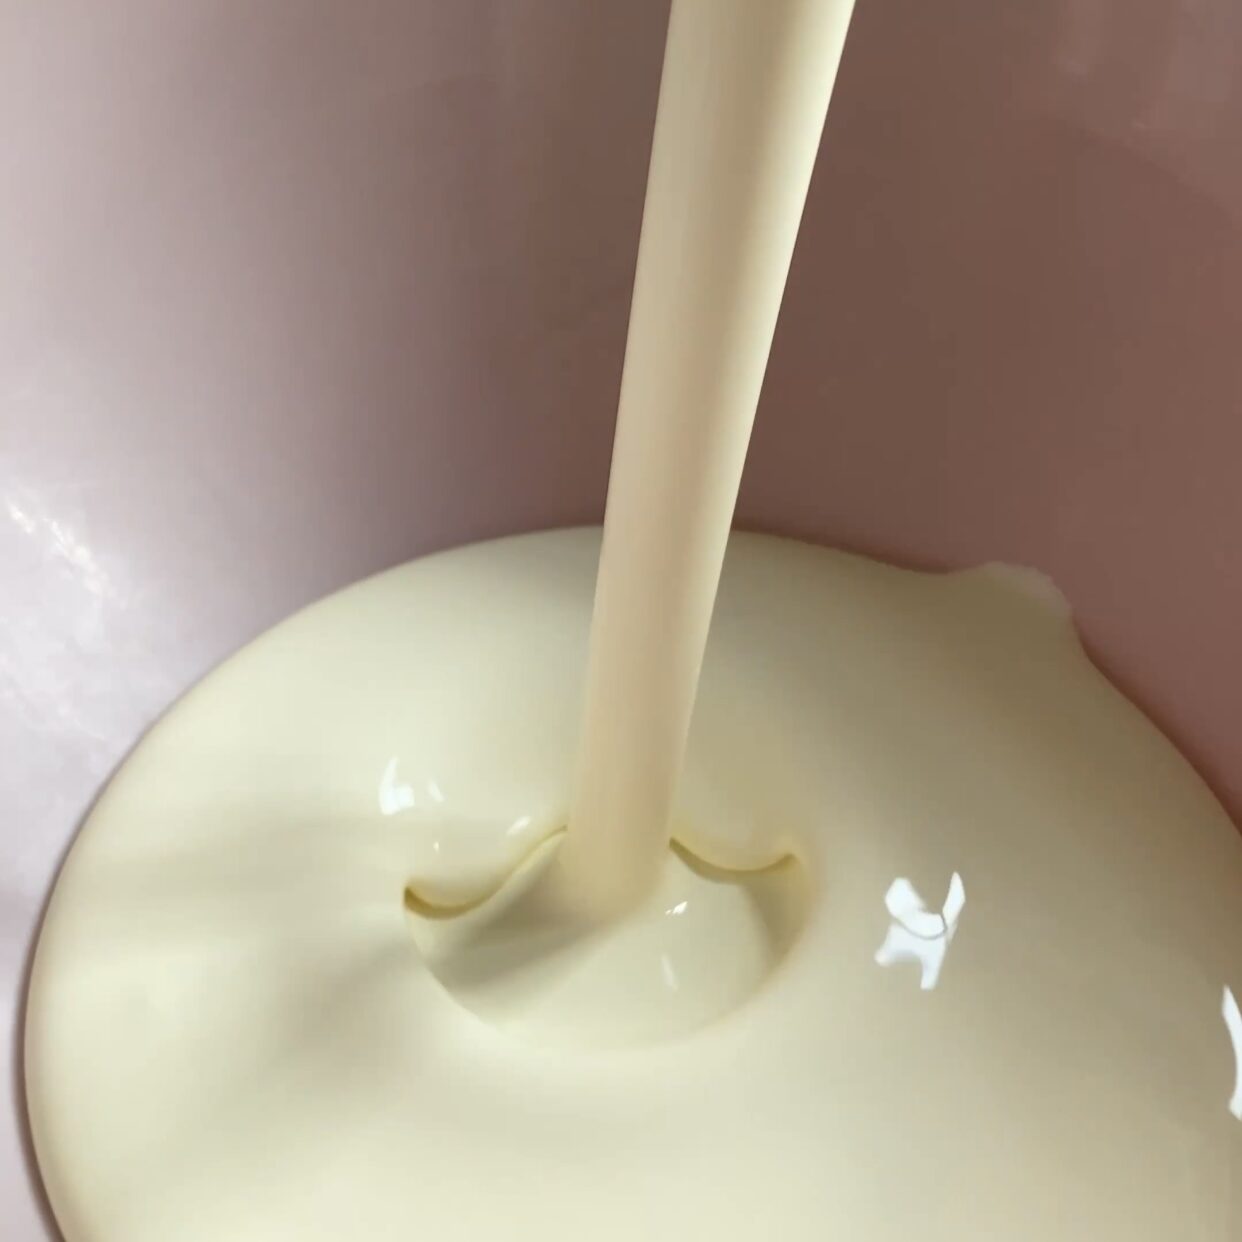
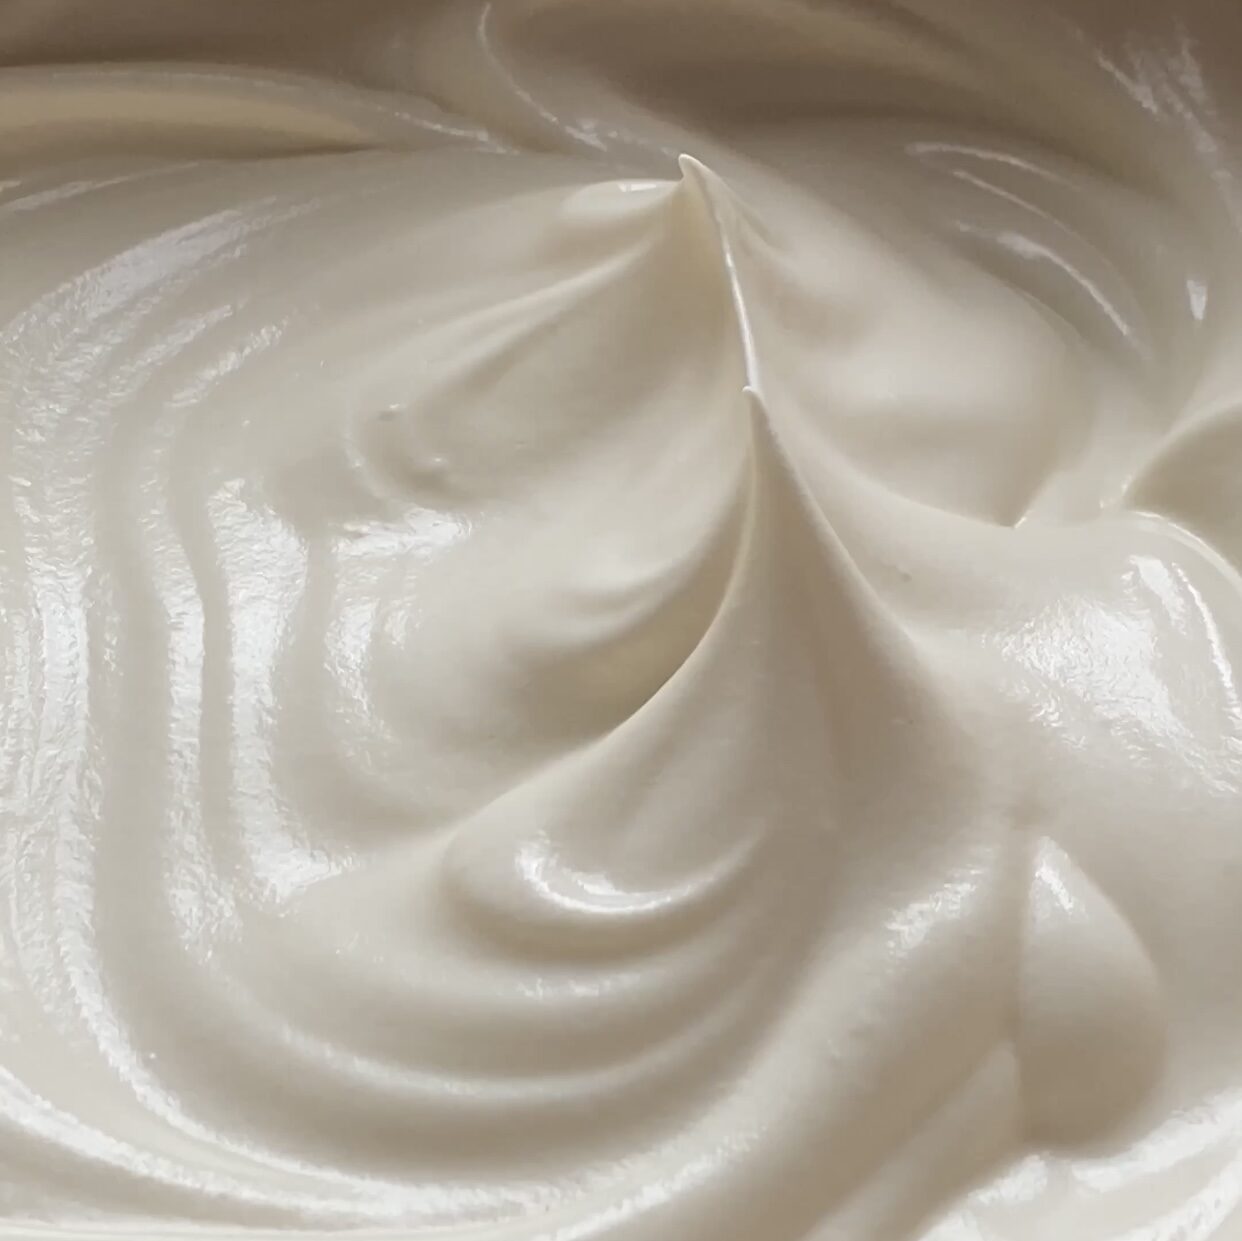
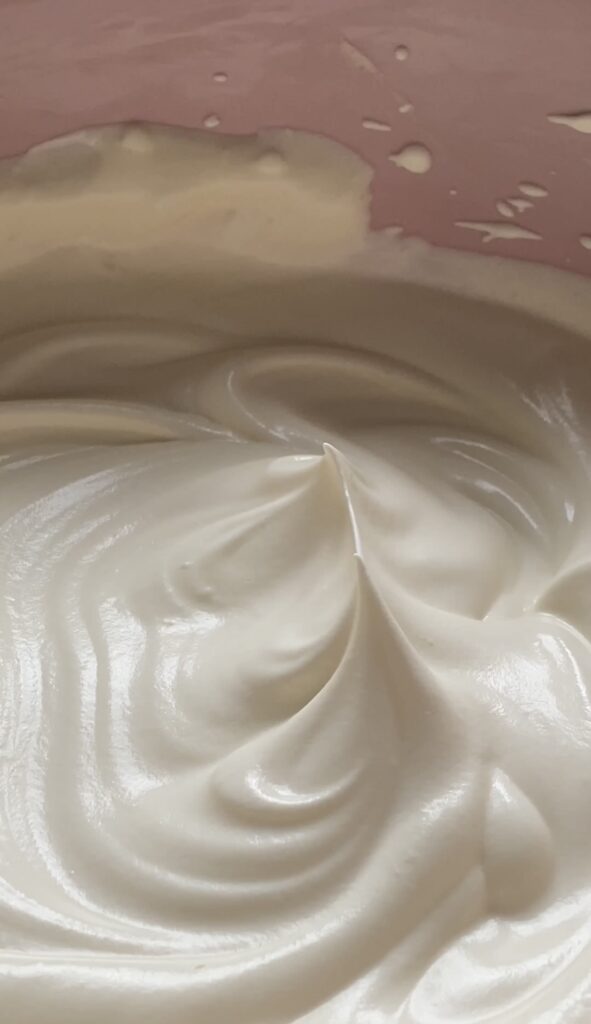
Step 3: In a large bowl add the double cream and icing sugar and whisk using an electric hand whisk to form stiff peaks.
In the UK we use double cream, however, I believe in some places they call it ‘heavy cream. You want to make sure you are using a cream with a high enough fat content because we want to be able to pipe the cream in the cups as well as stabilise it later on.
In this stage, you want to make sure your double cream (heavy cream) is cold. Sometimes your cream might not whip up into stiff peaks if the cream is too warm. I usually take the cream out of the fridge last minute, but if the temperature of your room is quite warm you could also keep the bowl in the chiller because the colder the cream the quicker it is to whip up into stiff peaks.
Adding the Chocolate Flavour
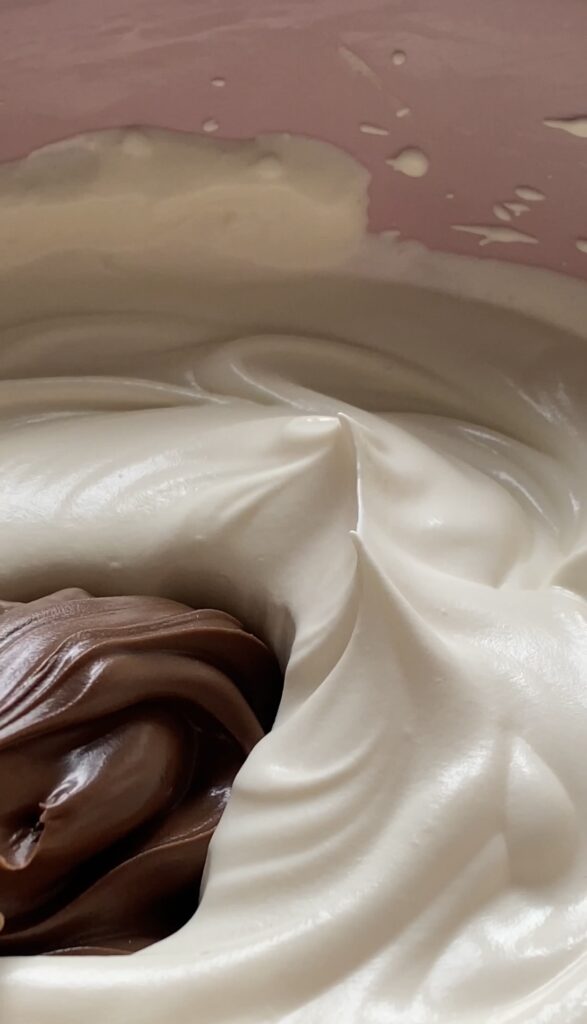
In the next stage, it is time to add the flavours. For this recipe I used my favourite chocolate hazelnut spread, you could use any flavour spread you like. I also added a little bit of cocoa powder and Oreos to help balance out the sweetness.
Step 4: Using a large spatula fold in the chocolate spread and the cocoa powder.
During this stage, you want to make sure you don’t over-mix and knock out any air created when whipping the cream. To prevent knocking out the air I used a folding method to fold the ingredients until they were well combined.


Filling the Cups
Step 5: Add the moose to a large piping bag, then pipe into each dessert cup.
The easiest way to fill these dessert cups is by adding the mixture to a large piping bag. I bought mine from amazon, they’re really good quality and the perfect size because all the mixture fits perfectly in one bag at a time, so you don’t have to worry about refilling the bag halfway through.
Once you have piped the chocolate moose into each cup tap each cup on a flat surface to push out any air bubbles.


Decorating
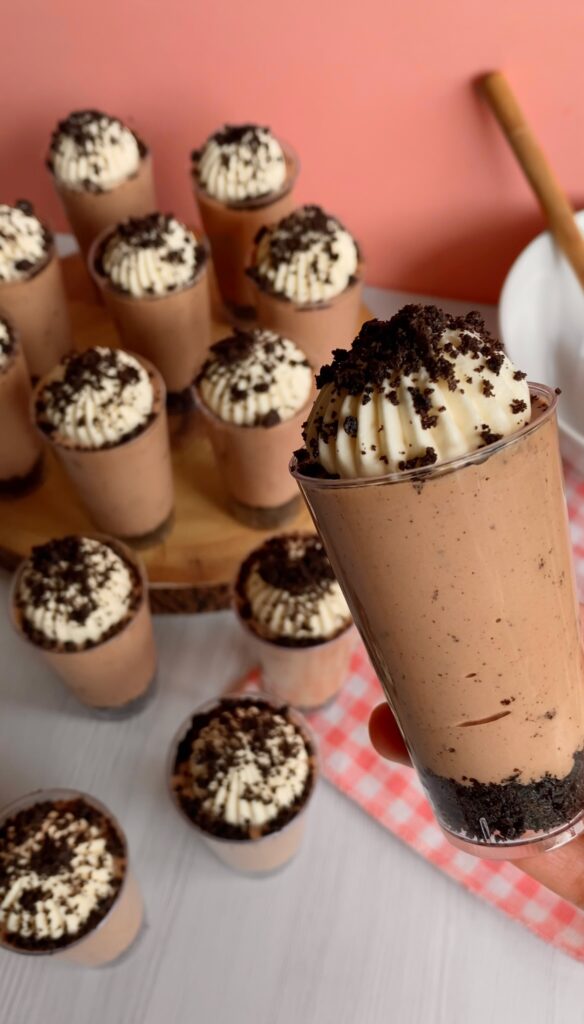
This is the fun part. I decided to decorate mine with extra whipped cream and Oreo crumbs which I crushed up using a rolling pin.
For the whipping cream, I used a sultan nozzle, however, I did remove the inside of the nozzle for a nice dome effect. This piping nozzle is definitely one of my favourite piping nozzles, it creates a sophisticated yet effortless look to all my bakes, so I definitely recommend adding it to your collection. If you don’t have the sultan nozzle you can use any piping nozzle you like.
The great part about decorating dessert cups is that the design options are endless, so feel free to unleash your creativity.

Easy Chocolate Moose Dessert Cups
Description
The layers consist of a yummy Oreo biscuit base filled with a layer of hazelnut chocolate moose filling, topped with classic whipping cream and Oreo sprinkles. This recipe comes together in no time.
Ingredients
Biscuit Base
Chocolate Moose Filling
Decorations
Instructions
-
Crush 200g Oreo biscuits in a large bowl to form fine crumbs (using a rolling pin or food processor). Save about 25g for later.
-
Pour the melted butter into the bowl and stir until all of the biscuits are fully coated.
-
Next, add 2tsp of biscuits to each dessert cup. (recipe makes 16)
-
Press the biscuit flat using another dessert cup (this step is essential if you want perfectly even layers).
-
In another bowl add the double cream and icing sugar. Whisk until stiff peaks form.
-
Add the Nutella and cocoa powder and mix until combined (don’t over mix as you will knock out some of the air).
-
Add the Oreo crumbs, then fold them into the mix.
-
Then fill a large piping bag with the mixture.
-
Pipe into all of the cups. Then tap each cup to push out any air bubbles.
-
In another bowl add 200ml double cream and 4tsp icing sugar and whisk until stiff peaks form.
-
Place whipping cream in a piping bag using a piping nozzle of your choice.
-
Pipe a small amount of cream on each cup. Then sprinkle with Oreo crumbs.
-
Place in the fridge to chill for 20 minutes.
-
Once chilled enjoy.
Note
This recipe is super easy and simple, but also customisable too. Simply swap out the chocolate spread and the Oreos for your favourite spreads and decorations to create a delicious no-bake moose cup.

