
Biscoff cheesecake has always been one of my most popular recipes, and for good reason—it’s creamy, indulgent, and so simple to make. I’ve updated the recipe slightly to make it even easier to follow, with clearer steps and a few little improvements. These cheesecake cups are the perfect no-bake treat: smooth Biscoff filling on top of a buttery biscuit base, finished with an irresistible drizzle and crunch. Quick to prepare, no oven required, and guaranteed to impress!

*This post may contain affiliate links. Please read my disclosure for more details!*
Making The Biscuit Base
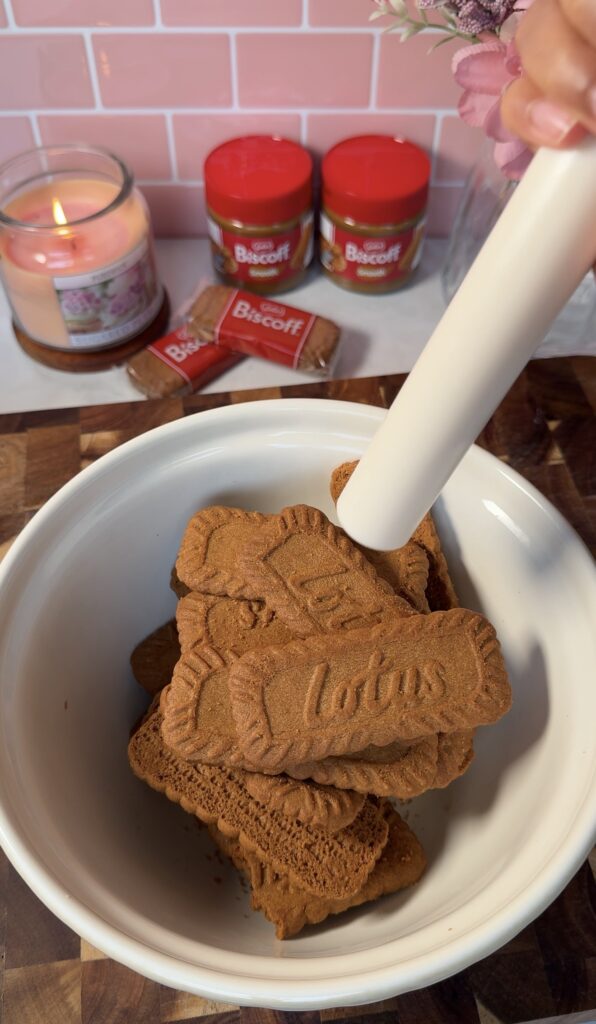
Step 1: First start by crushing the Biscoff biscuits into fine crumbs using a food processor or rolling pin.
When crushing the biscuits you want to make sure all of the biscuits are evenly crushed into fine crumbs. The quickest way to achieve this is by using a food processor however, if you don’t have one you can use a rolling pin as it works just as well, but requires a little extra time.
Step 2: Next add the melted butter. Then mix until the biscuits resemble a wet sand consistency.
The first time I tried this recipe I accidentally used a little too much butter, which ended up resulting in the biscuits forming a super solid base at the bottom of the dessert cup, making it difficult to eat. When It comes to making dessert cups less butter is definitely better than too much.

Dessert Cups
There are many different styles of dessert cups available, they also come in a variety of sizes making them perfect for any occasion.
For this recipe, I use 3oz dessert cups from Amazon. I also used the same size cups for my Ferrero Rocher cheesecake and Strawberry cheesecake cups.
Step 3: After your biscuits are fully coated in butter, it’s time to equally add the biscuits to the cups.
I like to use measuring spoons because it makes it easier to roughly estimate the amount of biscuit you add to each cup.
Tips For Success
- Use cold cream
- Make sure your double cream is straight from the fridge. Cold cream whips up better and helps the cheesecake set firmly.
- Whip until just thick
- Don’t over-whip the filling or it can split. Stop as soon as it holds its shape and forms soft peaks.
- Press the base firmly
- Use the back of a spoon or the base of a cup to compact the biscuit layer—this keeps it neat and stops crumbs from mixing into the filling.
- Room-temp cream cheese
- Let cream cheese soften slightly before mixing. Cold cream cheese can go lumpy.
- Chill long enough
- Minimum 3 hours, but overnight is best for a firmer cheesecake.
- Neat piping
- Use a piping bag (or a zip-lock bag with the corner snipped) to get even layers without mess.
- Decorate just before serving
- Drizzle and add biscuit toppings at the last minute so they stay crisp.
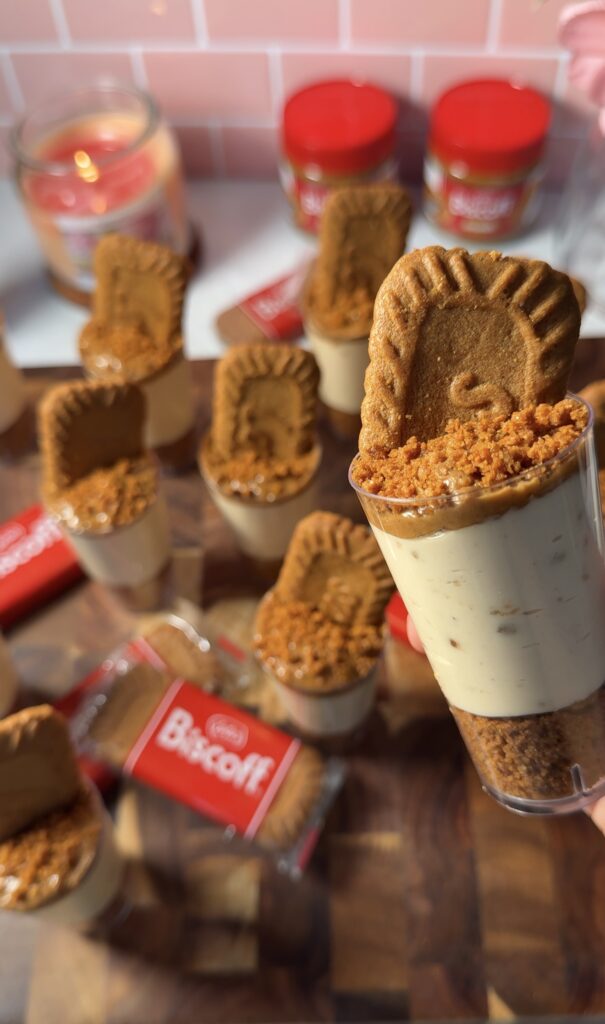

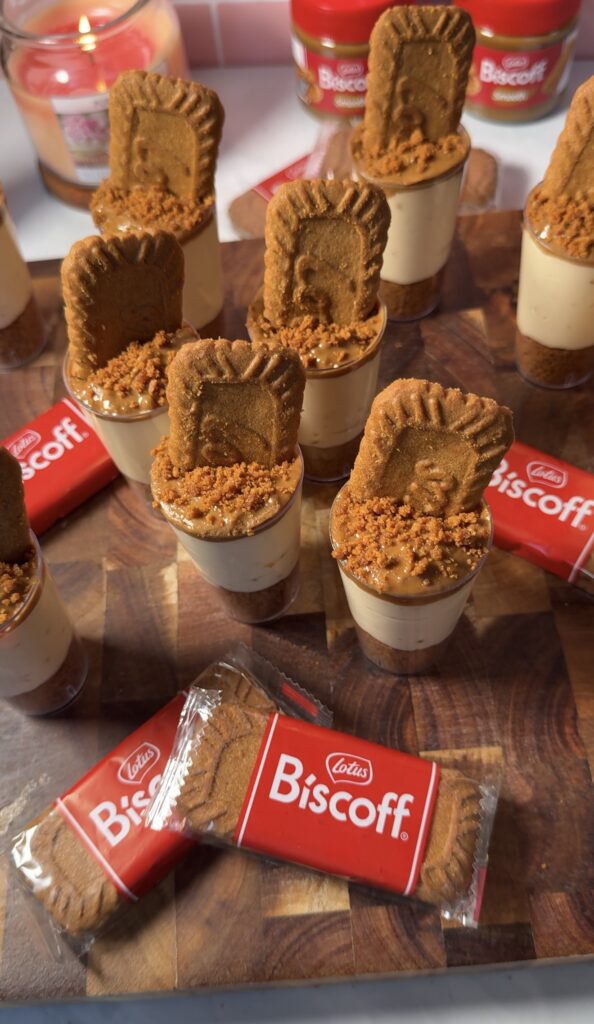
Biscoff Cheesecake Cups
Description
Creamy no-bake Biscoff cheesecake layered over a buttery biscuit base, finished with a drizzle of melted Biscoff and crunchy biscuit topping—perfect little cups of indulgence
Ingredients
Biscuit Base
Cheesecake Filling
Decorations
Instructions
-
1. Crush the Biscoff biscuits into fine crumbs. Mix with melted butter until combined. Spoon about 3 teaspoons of the mixture into each of the 16 cups. Use the base of another cup to press down firmly and form an even crust.
-
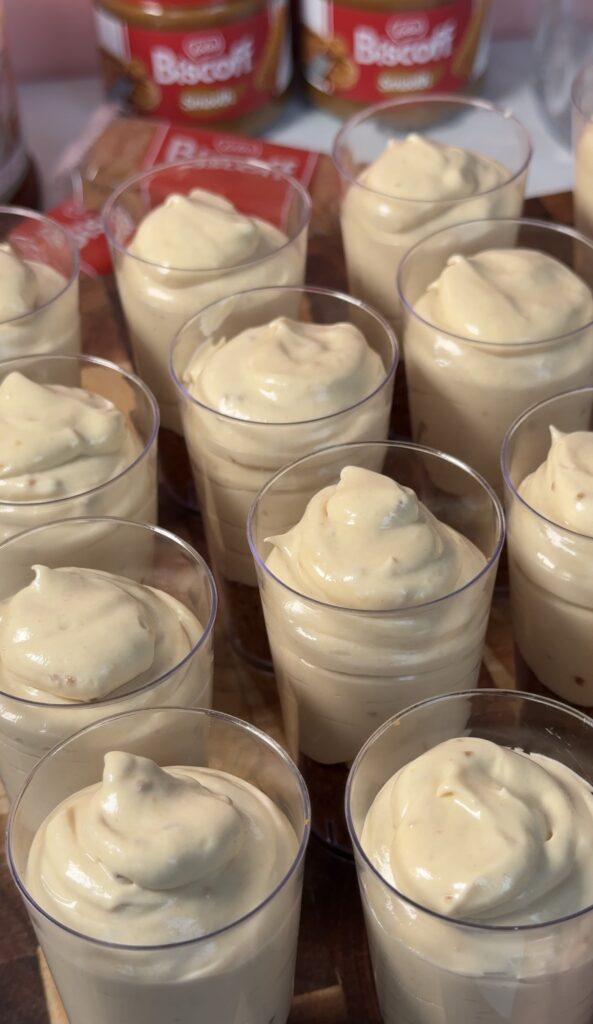
2. In a mixing bowl, whisk together cream cheese, Biscoff spread, and icing sugar until smooth. Pour in the cold double cream and whisk again until the mixture thickens enough to hold its shape.
-
3. Pipe the filling over the biscuit bases in each cup. Tap the cups lightly on the counter to remove any air bubbles.
-
4. Place in the fridge for at least 3 hours, or until fully set.
-
5. Drizzle with melted Biscoff spread. Sprinkle with biscuit crumbs and finish with half a Biscoff biscuit on top and enjoy!
Note
You can make this dessert a day before to allow the cheesecake to fully set, just keep in mind the biscuit decorations will soften in the fridge. I’d recommend decorating just before serving if you prefer a crunchy biscuit.

