
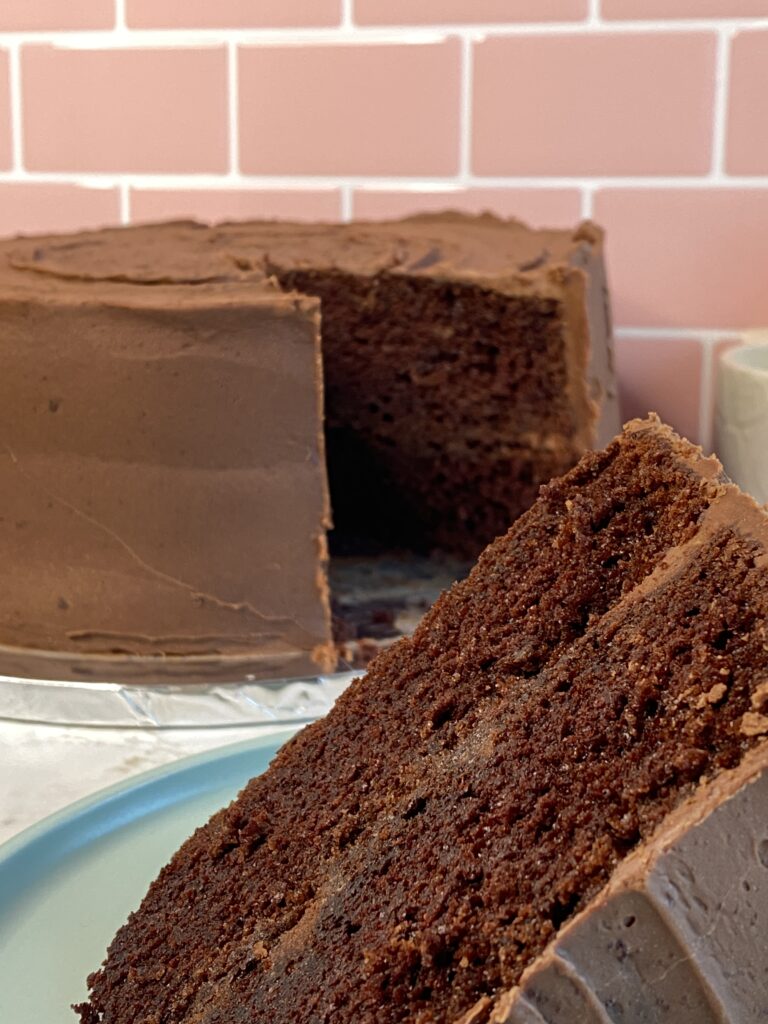
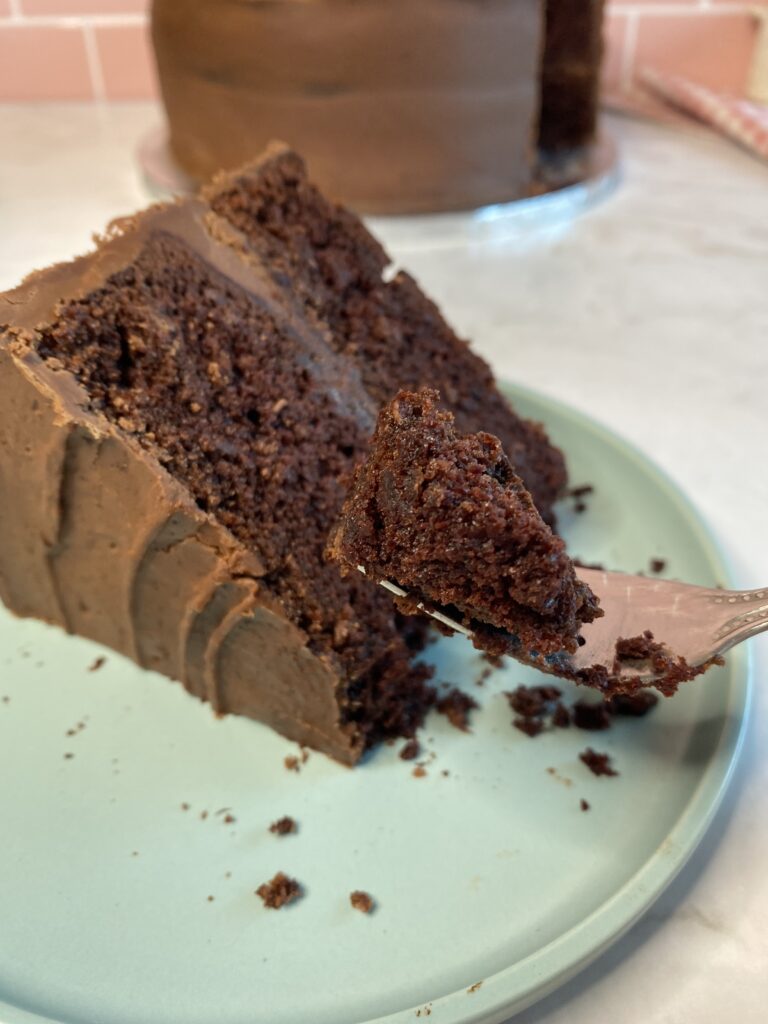
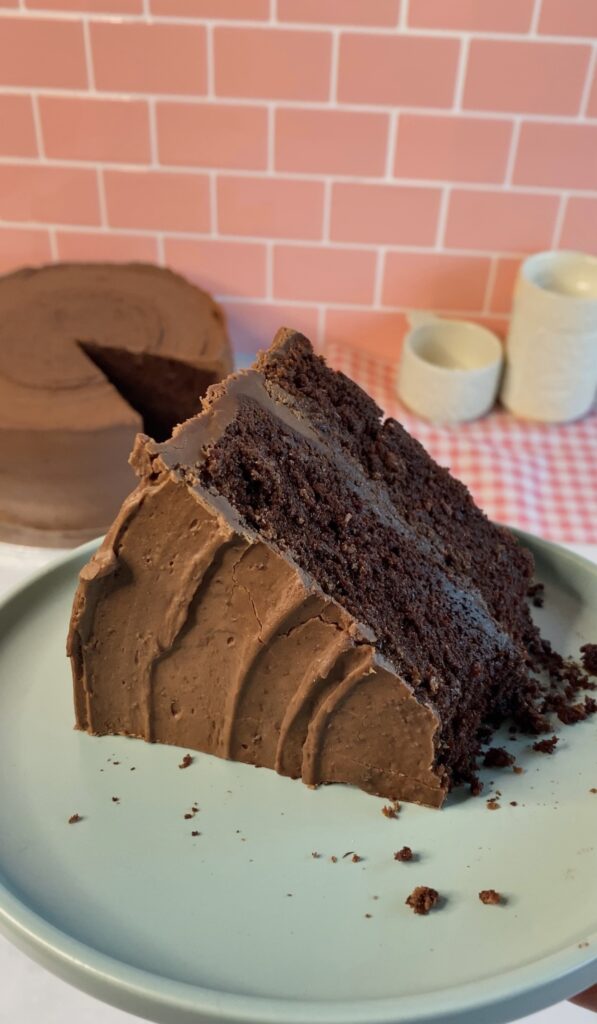
I don’t know about you, but chocolate cake is definitely at the top of my list when it comes to cakes. Especially when the cake is super fudgy and chocolatey. This recipe is perfect if you’re looking for something chocolatey, fudgy and decadent. I guarantee you this recipe will not disappoint. Once you take a bite it will be absolutely irresistible.
Although this recipe requires quite a few ingredients, the process of making the cake is really easy to learn. The actual hands-on process of baking this cake is immensely satisfying and really fun.
*This post may contain affiliate links. Please read my disclosure for more details!*
Why is it called a devil’s food cake?
So originally I thought it was called ‘devils’ cake because once you start eating it you just can’t stop but help yourself to another slice. Well, I was way off, it actually originated in the 18th century. Any food products that were considered spicy, dark or rich were referenced as devilled. The chocolate cake was considered rich and dark and therefore seen as ‘sinful’, hence the name ‘devil’ was used to describe food within this category.
What ingredients Do I need?
Butter– When baking I like to use unsalted butter, that way I’m able to control the amount of salt I put into my cakes. For this recipe, you will need softened butter usually at room temperature.
Sugar– For this chocolate cake I like to use a combination of light brown and caster sugar. Caster sugar provides sweetness to the cakes, while light brown sugar provides extra moisture and flavour.
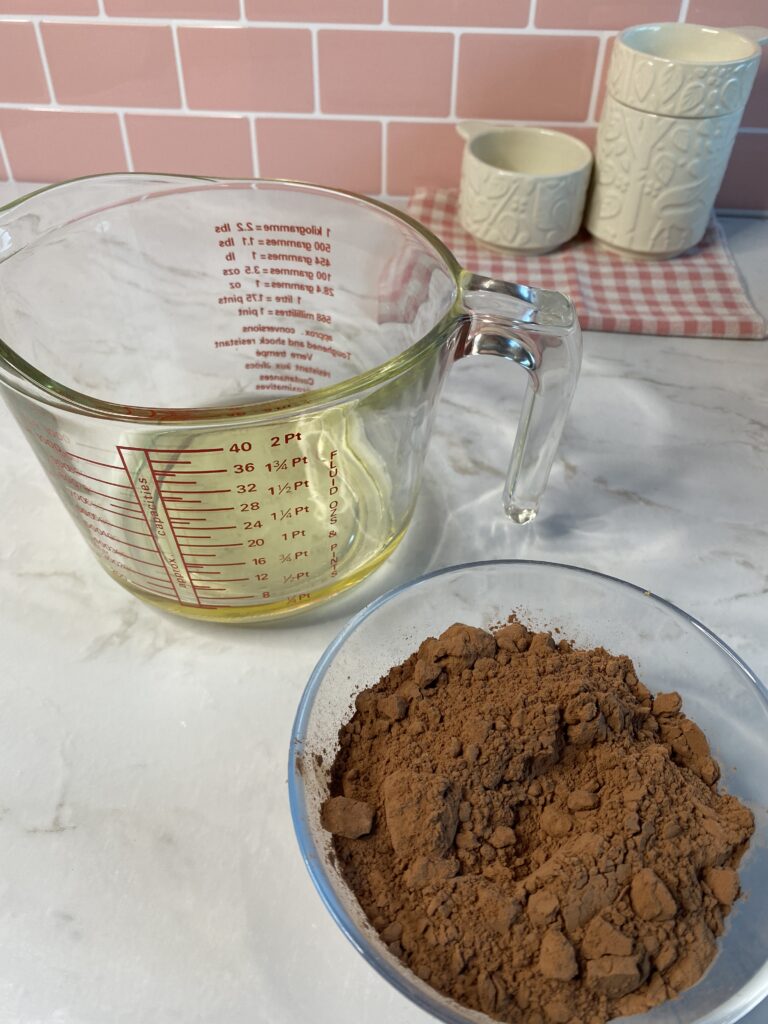
Oil– In most of my chocolate cake recipes including my chocolate cupcakes I like to use a little bit of oil. The oil makes the texture of the cake incredibly moist and fluffy.
Cocoa powder– To make this cake chocolatey you will need cocoa powder. In this recipe, I used regular cocoa powder that you find in many supermarkets in the UK.
Eggs– Always use room-temperature eggs when making cakes. If you store your eggs in the fridge remove them about 30 minutes before to allow them to return to room temperature. For this recipe, I used 3 large eggs.
Flour– For this recipe, I used plain flour because devil’s chocolate cake is slightly dense in comparison to a standard chocolate cake.
Bicarbonate of soda & Baking powder- This is going to help the cakes rise, but the bicarbonate of soda will also react with the greek yoghurt making the cake super fluffy and moist.
Greek yoghurt– It’s also important that you use full-fat yoghurt. This is definitely an important ingredient if you want to achieve a super moist decadent cake, as the bicarbonate of soda will react with the yoghurt.
Hot coffee– I’ll say this now you will not be able to taste the coffee in the cake. The coffee will help just help bloom the cocoa powder, making the cake super rich and chocolatey in flavour. I usually just add one teaspoon of instant coffee granules to the hot water and that’s pretty much it. If you really don’t want to use the coffee, replace it with the same amount of hot water instead to help thin out the batter.
Recommended Equipment
- Kitchen scales– When baking it is super important that you measure out the ingredient quantities accurately. I recommend using digital scales because they provide a precise reading making it the most accurate way to measure out the ingredients.
- Measuring spoons– To measure out the raising agents and salt I used measuring spoons, these aren’t the ones you eat with. They will ensure you get an accurate measurement to provide you with the best results.
- Large Mixing Bowl– Any large bowl will work. Just remember it’s always better to use a much larger bowl than a smaller one, believe me, I make this mistake all the time.
- Spatula– To ensure all of the ingredients are fully combined, use a spatula to scrape down all of the sides of the bowl. This will ensure all of the ingredients are equally incorporated. You can find great good quality kitchen utensils sets from Amazon in a variety of different colours. If you are on a budget IKEA also has some good quality individual spatulas that are less than £2.
- Electric Whisk– In this recipe, it isn’t an essential piece of equipment, you could still make this without one. However, it will make it a lot easier to cream the butter and sugar. If you don’t have one you could use a wooden spoon, but you might have to work just a little harder to make the butter light and fluffy.
- 2x 9-inch round sandwich tins– This recipe makes two 9-inch round cakes. I used sandwich tins for this recipe because they are easier to grease with butter and flour. However ,if you have loose bottom tins or springform tins they will work too.
- Turntable– They make decorating cakes really easy. You can easily achieve a smoother finish using one. So if you really enjoy decorating cakes I’d definitely recommend investing in one.

How to make the Devil’s Chocolate Cake
Step 1: Preheat the oven to 160C Fan. Before you start making the cake batter it’s always best to turn the oven on. This will ensure your oven is preheated to the correct temperature while you’re mixing and preparing your tins.
Step 2: Line your tins using either the butter and flour method, parchment paper, or cake release spray.
Step 3: In a large bowl cream the butter and sugar together until fluffy and pale in colour.
Step 4: Add in the eggs and the vanilla extract. Continue to whisk until everything is evenly combined. It’s always a good idea to scrape down the bowl using a spatula to ensure all the ingredients are equally incorporated.


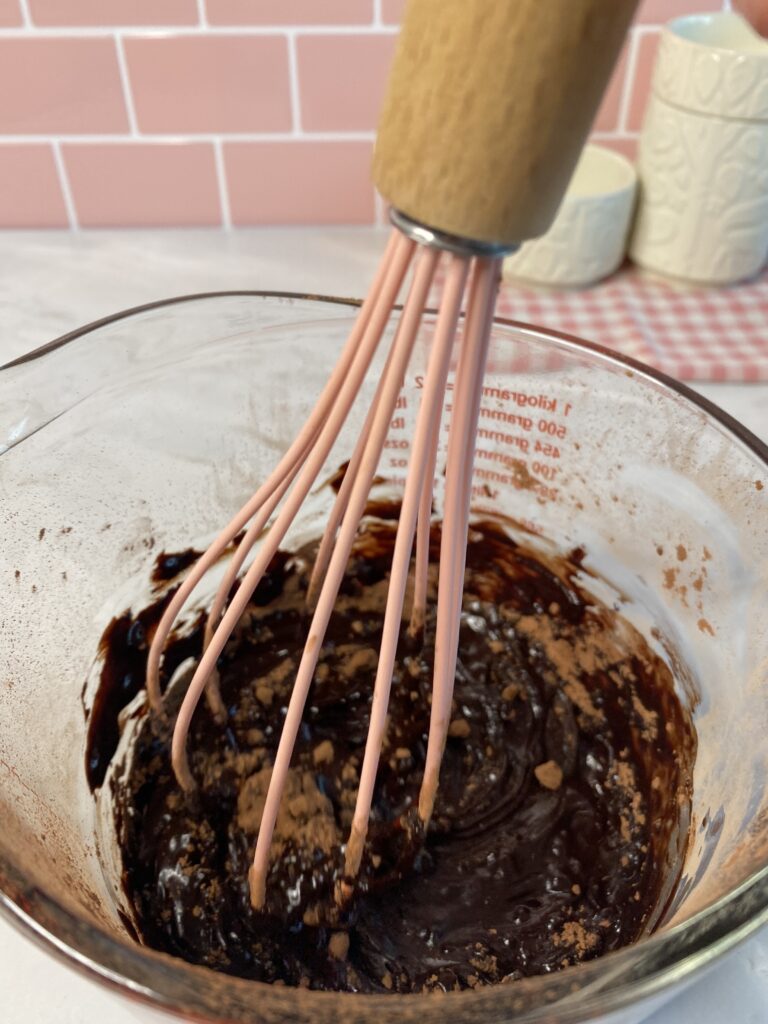
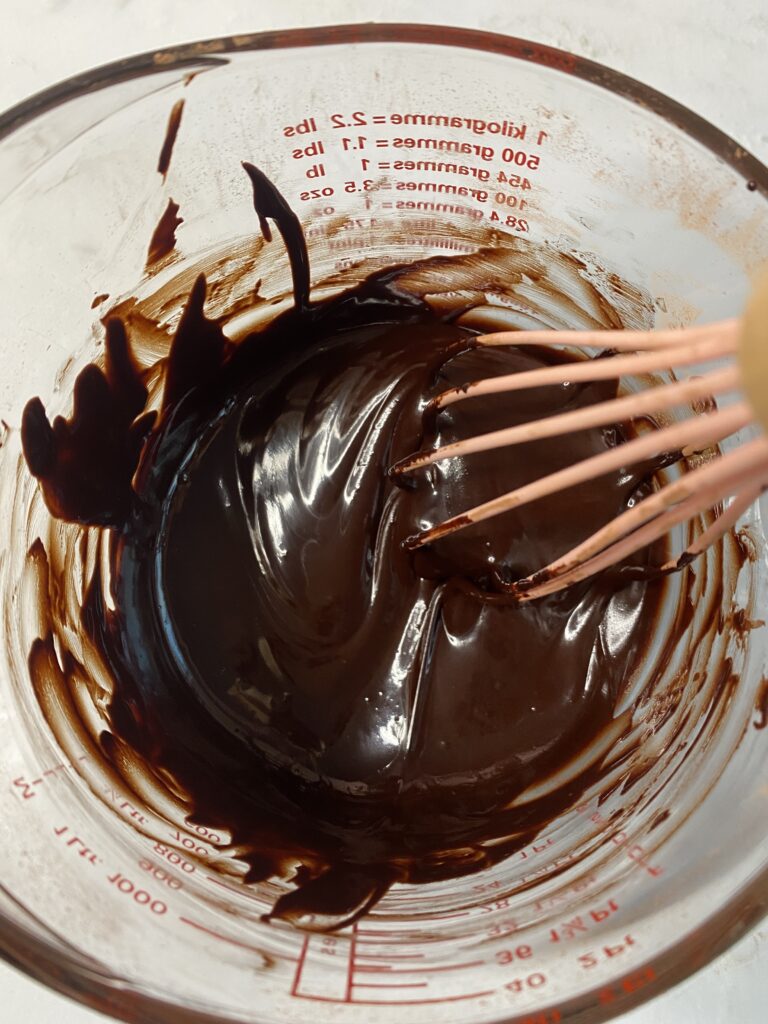
Step 5: In another bowl whisk the oil and cocoa powder until the mixture is smooth. This part is very satisfying, you’ll end up with a thick melted chocolate consistency. Once you have finished mixing, add the chocolate mixture to the rest of the cake batter.
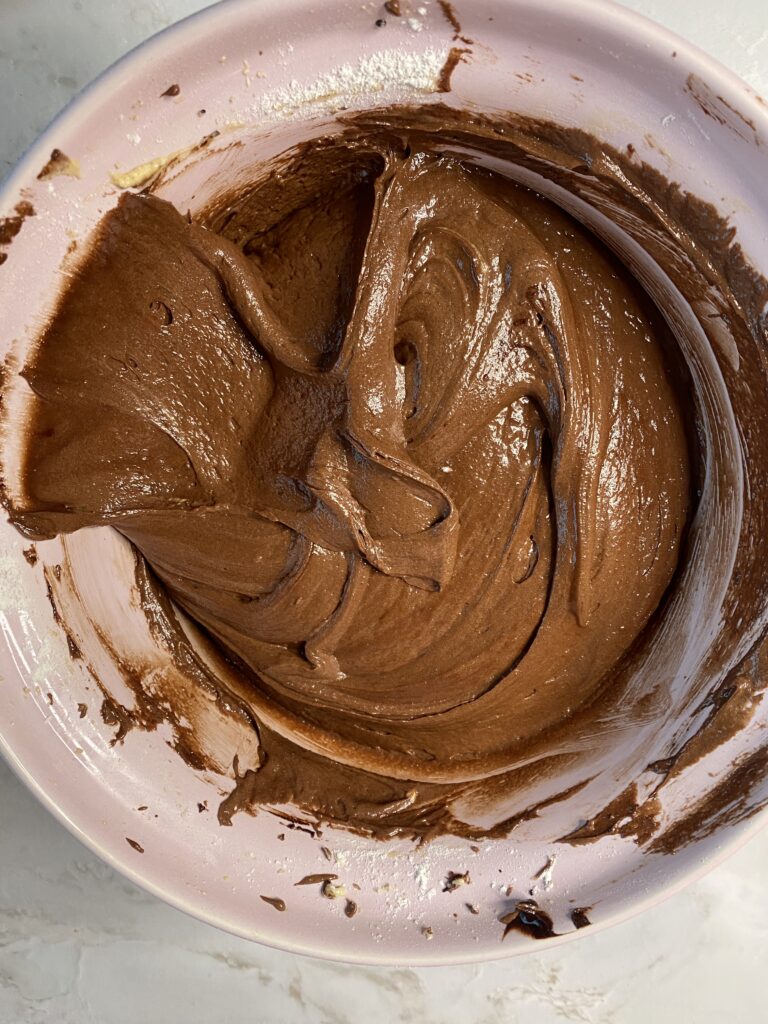
Step 6: Add the flour, salt and raising agents. Then add half of the milk and yoghurt and whisk for a few seconds. Add in the remaining milk and yoghurt and mix until everything is smooth. Avoid over-mixing because this can cause a heavy texture.
Step 7: Slowly add the hot coffee and mix for a few seconds until smooth.
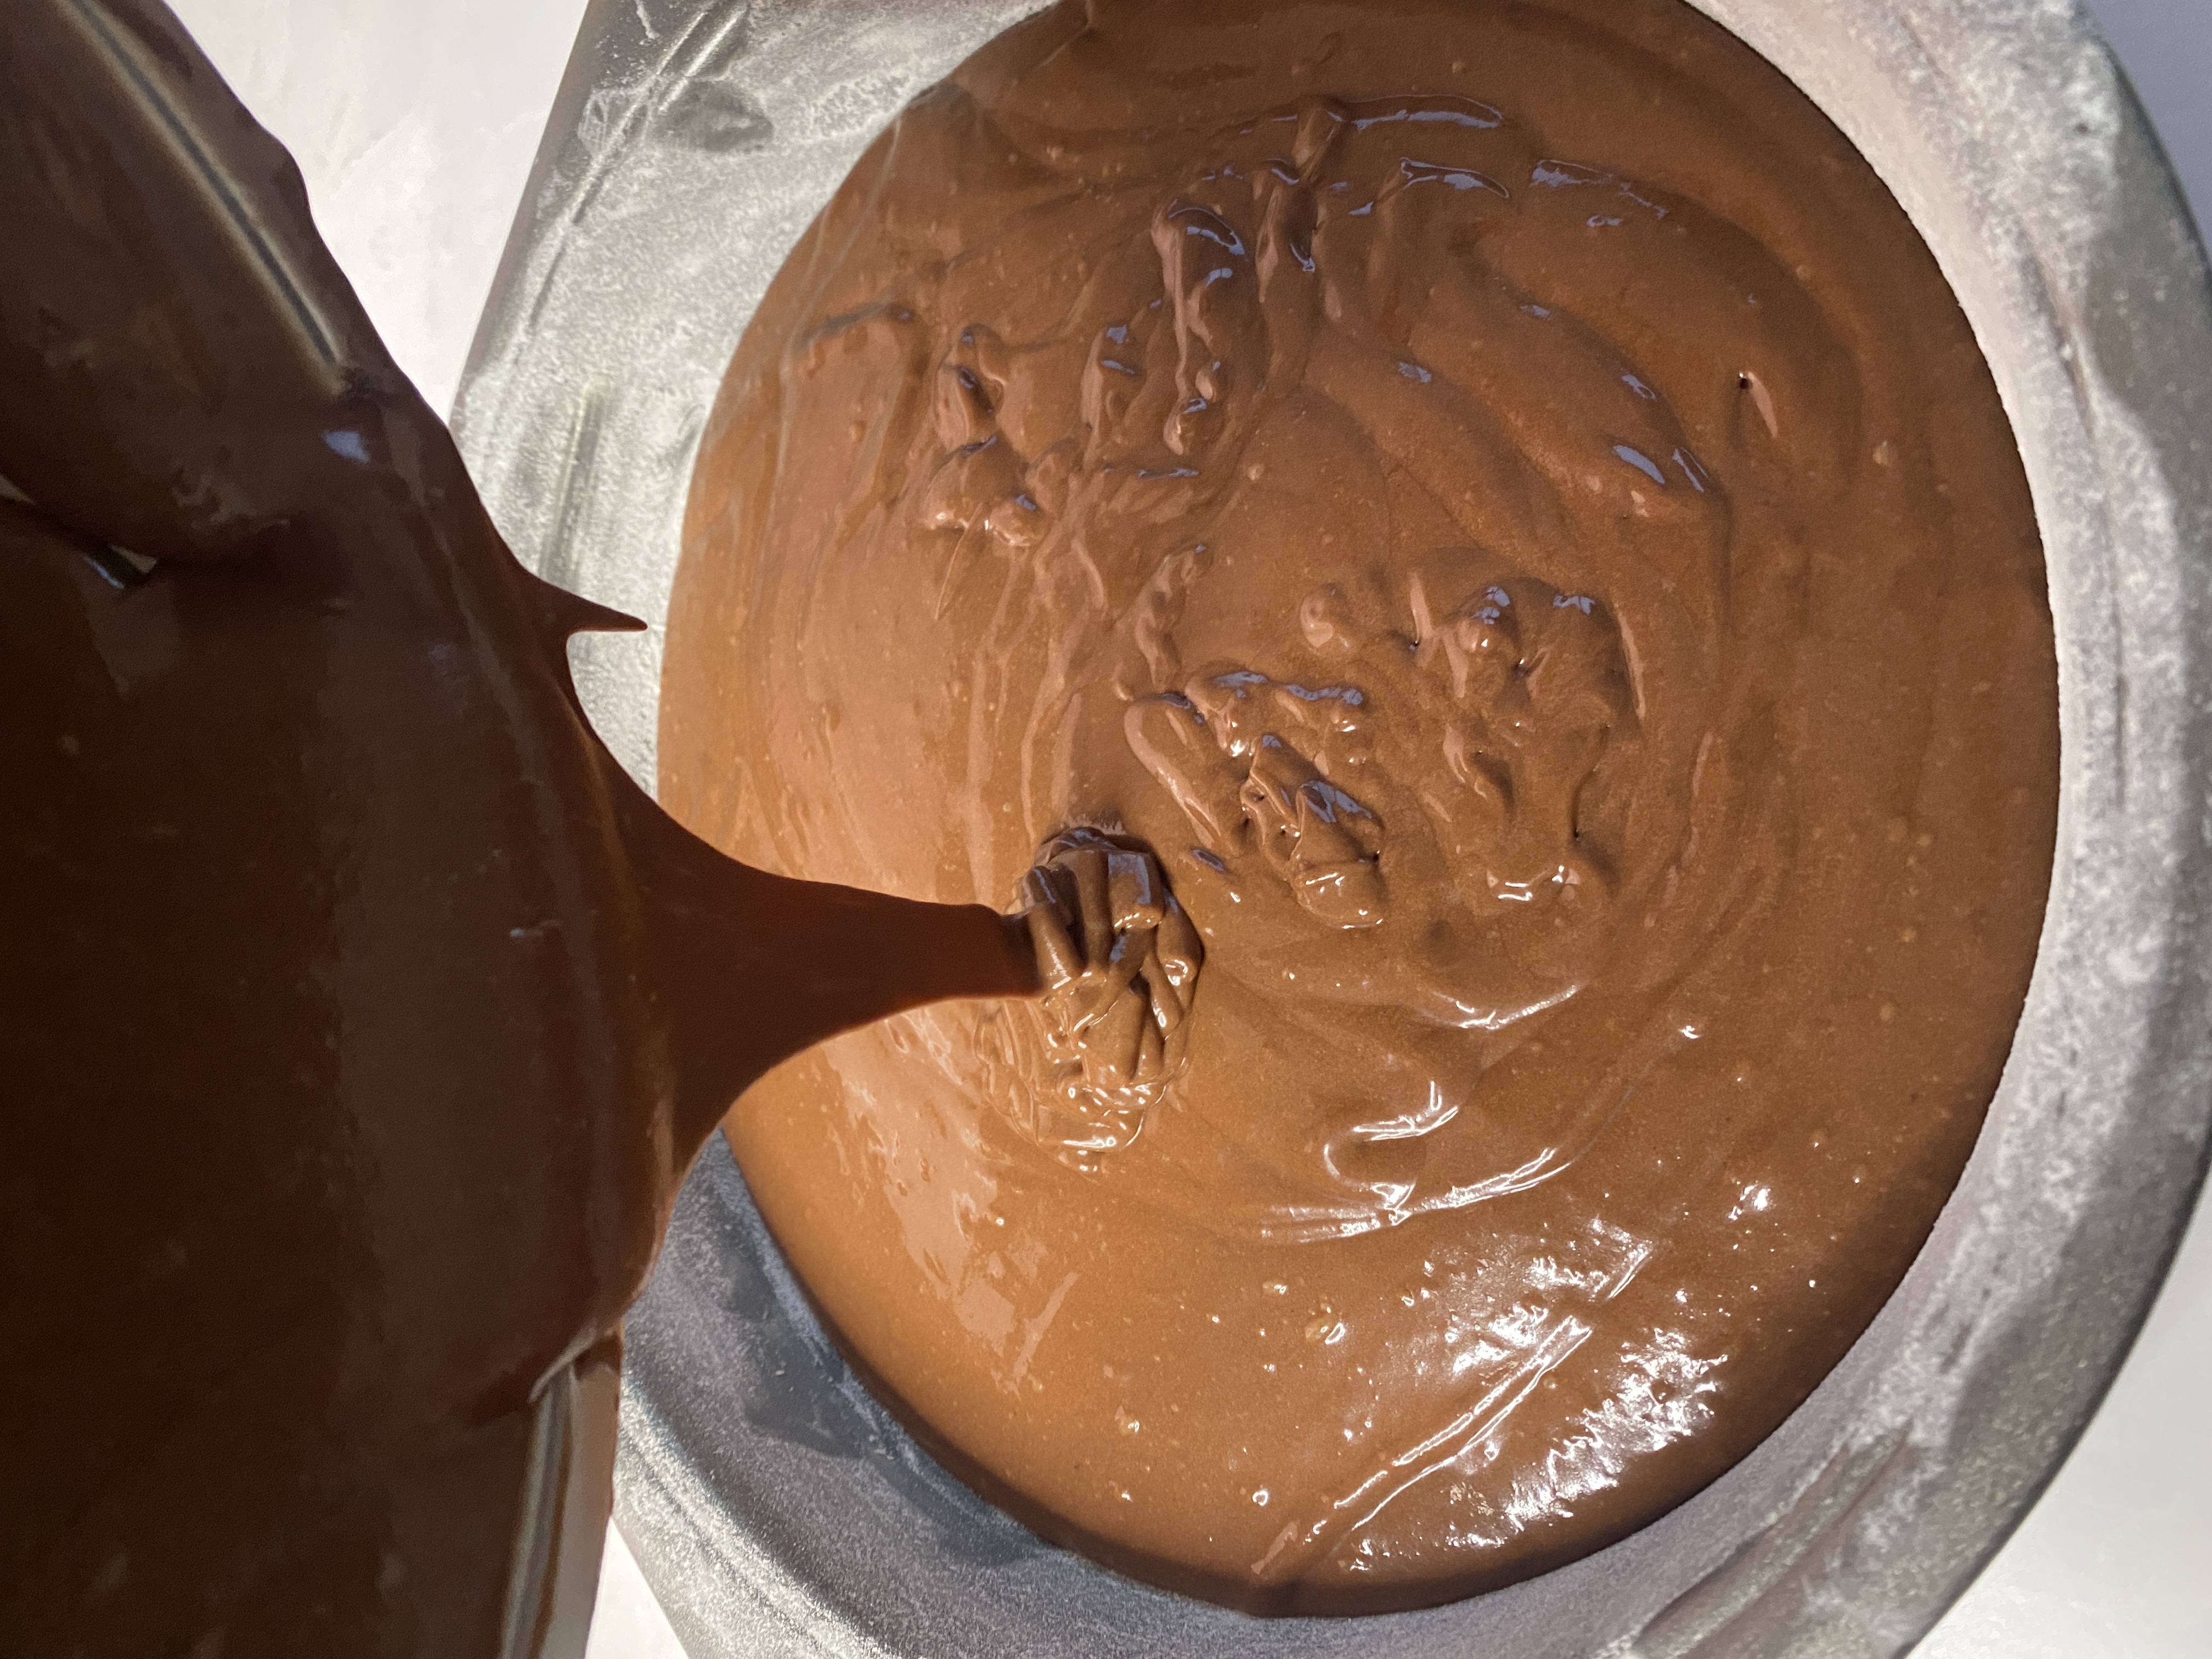
Step 8: Add the mixture to the lined tins. Then bake in the oven for 40-43 minutes. It’s important to bake cakes immediately once mixed because the raising agents begin to act as soon as they’re combined with the liquid.
As the cakes bake avoid opening the oven during baking as this reduces the oven temperature and can cause the cakes to sink in the centre.
Step 9: Once the cakes have been baked allow them to cool completely before decorating them with the chocolate ganache.


How to get a flat cake layer?
In order to achieve flat layers it’s important to understand what causes the layers to form a dome in the first place.
As the cakes bake in the oven the edges of the tin will heat up faster which will cause the edges of the cake to bake a lot faster and crisp up slightly, this will stop the cake from rising further around the edges causing the cake to look domed in the centre.
To prevent domed cakes I like to use baking belts around my tin. The baking belts cool the outside of the tin, which will prevent the sides of the tin from heating up too quickly, allowing the cake to rise evenly as it bakes.
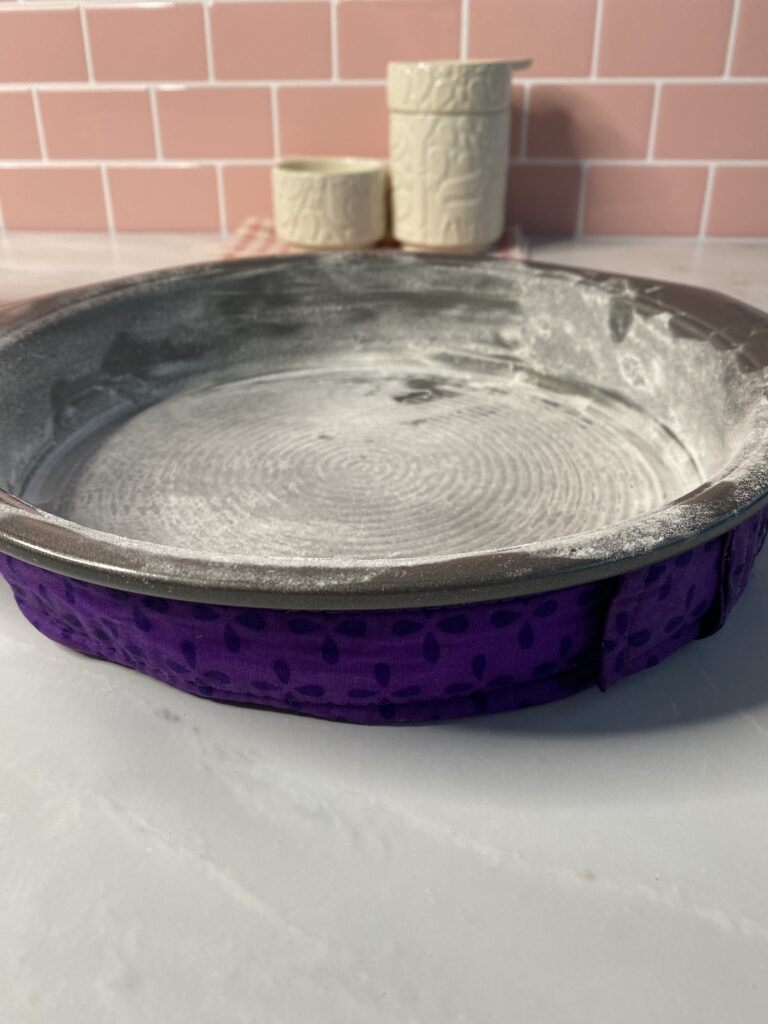
How to use Baking Belts?
Step 1: Start by soaking the baking belts in cold water.
Step 2: Then squeeze the excess water out so that they aren’t dripping with water.
Step 3: Wrap the baking belts tightly around the cake tins so they don’t fall off when you move them.
Step 4: Then add in your cake batter like normal.
Why are my cakes not coming out of the cake tins?
To prevent the cakes from sticking to the tins it is important to grease the tin before adding the cake batter. I’d recommend greasing the tins with a little bit of butter then dusting them with a bit of flour and then lightly tapping the excess away. The flour helps create an extra lining, therefore preventing the cake from sticking.
You can also buy cake release sprays which make preparing your tins a lot easier, so if you bake quite often this will probably save you a lot more time. Alternatively, you could also line your tin with greaseproof paper (parchment paper) instead if you prefer. Simply cut out a circle the same size as the tin then cut out a few long rectangles (enough to cover the sides). Then using a small amount of butter to stick the greaseproof to the tin.
How do I know when the cakes are baked?
You’ll know the cake is finished baking when the cake starts to pull away from the side of the tin. You could also insert a skewer through the centre of the cake, if the skewer comes out clean the cake is done.
Why did the centre of my cake shrink?
When baking it is important that you avoid opening the oven during baking. This reduces the oven temperature and can cause the cakes to sink in the centre. A fully baked cake should be well-risen. When you gently press the cake should spring back.
How to fix a domed Cake?
If your cakes come out of the oven with a slight dome there are two ways to fix this.
- As soon as the cakes come out of the oven allow the cakes to sit in the tin for at least 5 minutes. Then turn the cakes upside down on a cooling rack while the cakes are still warm, then let them cool completely.
- Alternatively, you could use a cake leveller or a large knife to trim the layers flat if your cakes have a much larger dome.
Please don’t forget to tag me if you try this recipe, I would love to see your recreation. If you like this recipe you might also like my carrot cake recipe.

Devil’s Chocolate Cake Recipe
Description
A delicious decadent devil's chocolate cake that’s super light and fluffy. Decorated with a beautiful soft silky chocolate ganache. The cake is so good you'll won't be able to resist another slice.
Ingredients
Chocolate Ganache
Instructions
-
Start by preheating your oven to 160C Fan. Then prepare your 2 tins by greasing them with a bit of butter and flour.
-
In a large bowl cream the butter for around 3-5 minutes until pale and fluffy. Then add in the sugars and continue to whisk together until the sugars are well incorporated.
-
Next, add in the eggs and vanilla extract and continue to mix the mixture until all the ingredients are well combined.
-
In a separate bowl whisk together the cocoa powder and oil until it becomes a smooth chocolatey consistency. Once smooth add to the rest of the cake mixture and mix for a few seconds until everything is equally incorporated.
-
Next, add the flour, salt, bicarbonate of soda and baking powder. Then add half of the milk and half of the greek yoghurt, and mix until everything is just combined. Then add the remaining milk and yoghurt and repeat the mixing process. Try to avoid over-mixing during this stage.
-
To make the coffee water add the instant coffee to the hot water and stir them together. Slowly add the coffee to the cake mixture, making sure to mix the mixture at the same time.
-
Divide the cake mixture into the prepared tins. Then bake in the oven for 40-43 minutes. To check if the cake is baked in the centre use the skewer test.
-
Once baked allow the cake to cool completely before decorating. While you're waiting you can prepare the chocolate ganache.
-
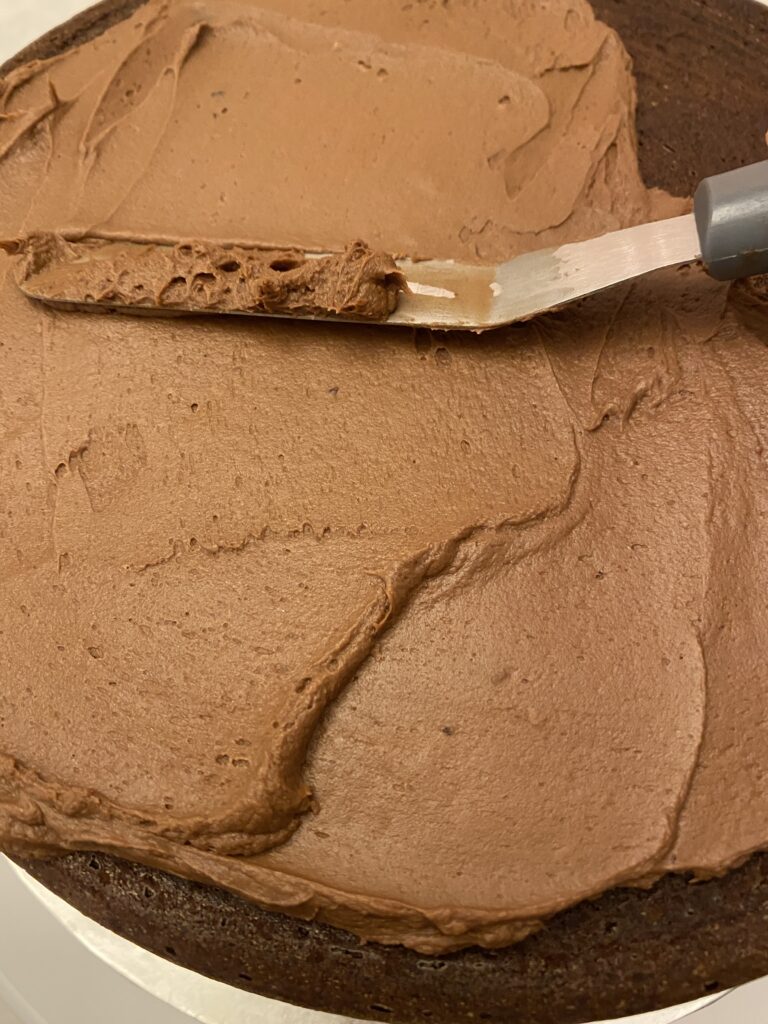
Melt the butter and chocolate in the microwave in short bursts making sure to mix during each interval. Once melted add in the cold cream and mix until smooth. Leave the ganache too cool until it reaches a spreadable consistency. Then whip the ganache for a few seconds for a light and airy consistency (the whipped part is optional).
-
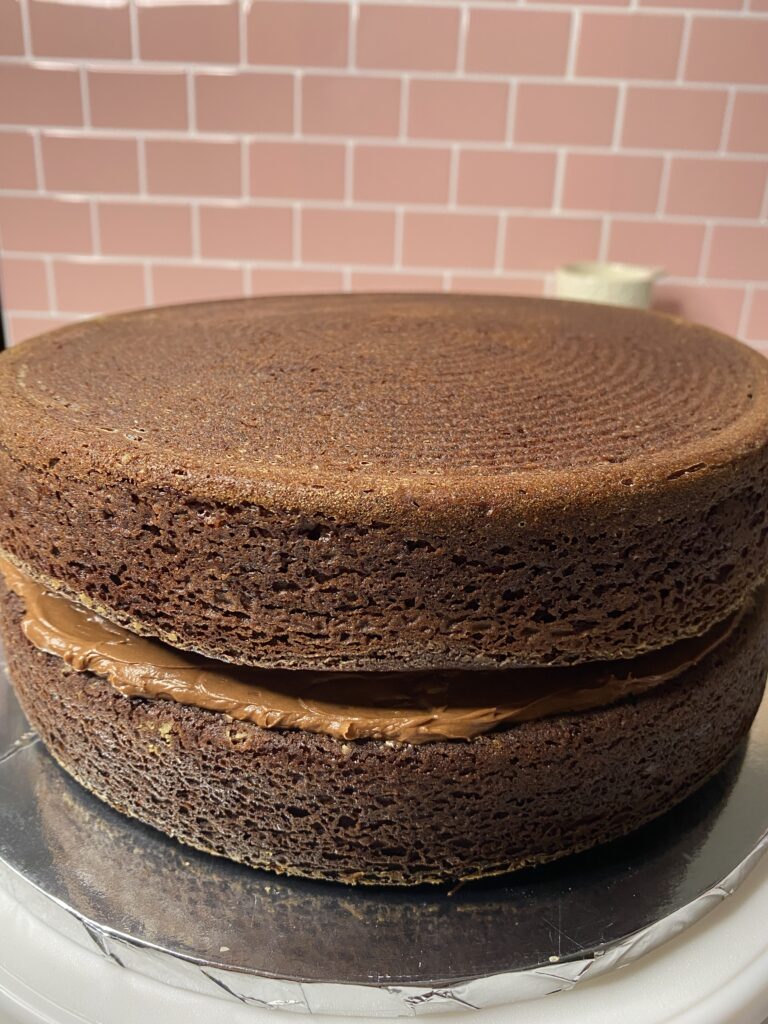
Once the cake has cooled decorate the cake by spreading a thin layer of the ganache between the cake layers. Then add more ganache to the exterior of the cake using an offset spatula and spread it out. Devil's chocolate cakes aren’t usually smooth so don’t worry if you can’t get a super smooth finish.
-
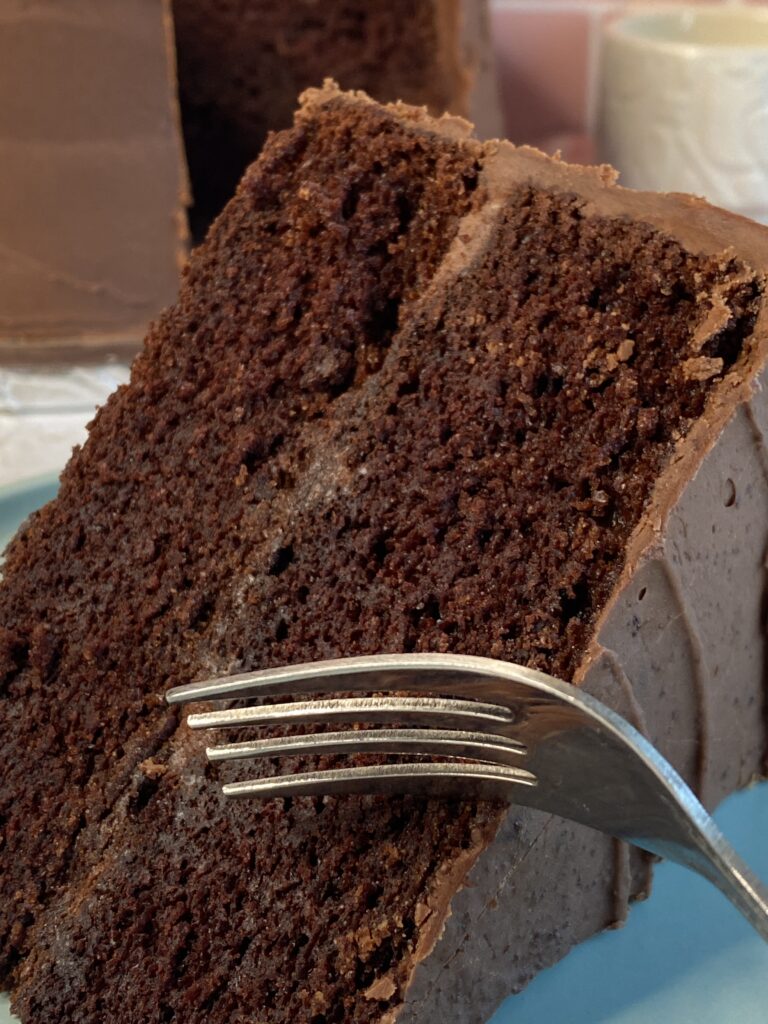
Once decorated, slice and enjoy.
Note
When the cakes have finished baking leave them to cool slightly in the tin for around 5-10 minutes before attempting to take them out of the tin. This is because the cake can be quite fragile when it's fresh out of the oven, so I'd recommend waiting just in case the cake breaks.