
It has come to my attention that you guys love the dessert cup series, so I thought why not give you another recipe? So initially I had seen a lot of milkshake flavours on my Pinterest feed, I was inspired by a tonne of cheesecake-flavoured milkshakes, this kind of gave me an idea. I thought why not create a cheesecake, but use different milkshake flavours- did you see what I did there?


*This post may contain affiliate links. Please read my disclosure for more details!*
So the question is how do I make the milkshake flavour for my cheesecake?
Well as a child I loved milkshakes, especially the Nesquik powder ones. So I thought why not use the milkshake flavoured powders to create the main flavours in the cheesecake?


How to make perfect cheesecake cups?
Biscuit Base
Step 1 is to crush up biscuits into fine crumbs. The quickest way to do this is by using a food processor, especially if you choose to upscale the measurements.
Do I have to use a food processor? No, not really, you can also use a rolling pin. For example, you may have noticed I like using a fondant rolling pin because it has a flat edge which makes it perfect for crushing up biscuits, plus this recipe only requires a few biscuits.
Tips for achieving a perfectly flat base:
- If you choose to use a rolling pin just make sure you crush the biscuit enough so that when you later press the biscuits down there won’t be any air gaps caused by uneven crumb sizes.
As long as you’re able to crush the biscuit into fine crumbs that’s all that matters.


Dessert Cups
The next steps are to choose your dessert cups. For most of my dessert cup recipes, I usually stick to 3oz dessert cups, simply because they are the perfect portion size for most of my recipes.


Making The Cheesecake Filling
To make the filling I add cold double cream to a large mixing bowl. It’s really important that you use cold double cream, as warm cream will not form stiff peaks. Essentially the colder the cream, the better and quicker it will whip. When it’s summer I sometimes like to leave the mixing bowl in the fridge because it helps speed things up, as the cream will stay cooler for longer.
Let’s talk, cream cheese! Unlike double cream we want are cream cheese to be room temperature. This is because cold cream cheese doesn’t blend evenly, which can lead to a grainy consistency. I don’t know about you but I definitely don’t want any grainy cheesecake.
For this stage, I like to use an electric hand whisk or a stand mixer because it makes it so much quicker, but also incorporates a lot of air. Making the end result so much more lighter and creamy in consistency.


Adding the Milkshake Flavour
Before whisking the double cream I like to add the milkshake powder and icing sugar. In this recipe, I used Nesquik’s strawberry flavour powder (my favourite flavour). After whisking the cream the colour will appear lighter, this happens because of all the air bubbles incorporated.
If you want the cheesecake to appear pinker, add a tiny amount of pink food colouring (I used Pro gel).


Assembling the Cups
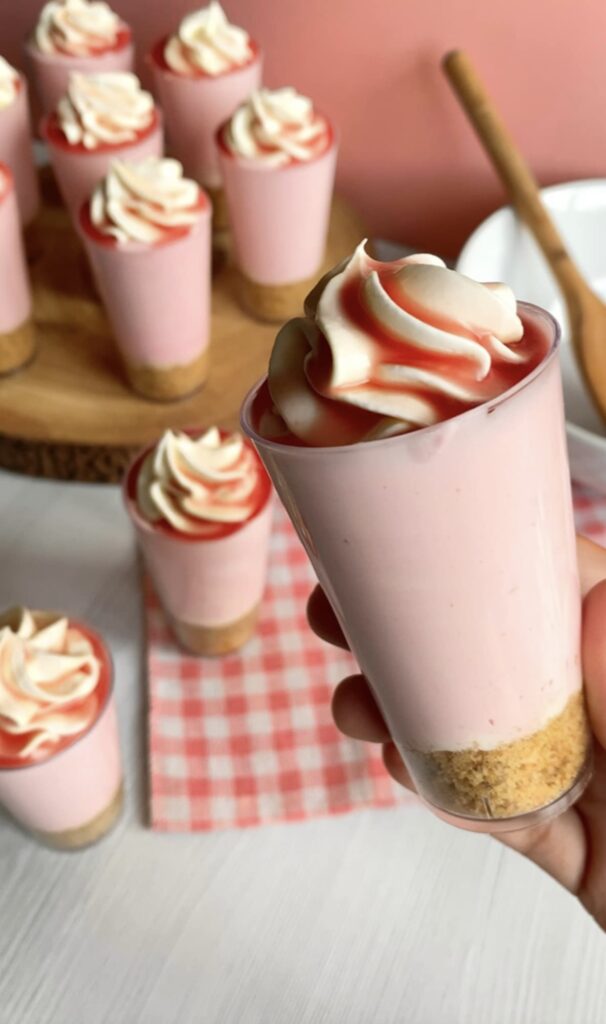
This recipe consists of 3 layers, the first layer being the buttery biscuit base. Then the strawberry milkshake filling. Topped with homemade whipping cream and strawberry sauce.
Tips
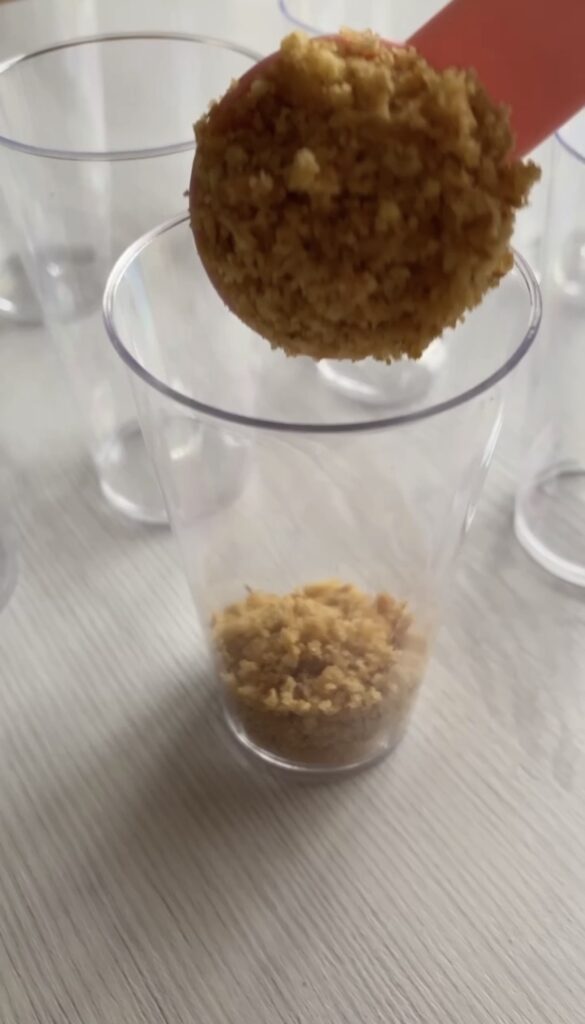
- To get perfectly even biscuit layers for all of your dessert cups take a teaspoon to measure out the amount of biscuit that goes into each cup. Another trick I learnt was to use another dessert cup to press the biscuit base flat. It makes it so much easier to achieve a crisp edge around the cup.
- When adding the cheesecake filling I find it so much easier to use a large piping bag. It just makes the process of filling the dessert cups so much quicker and neater.
- The piping nozzle used for the whipped cream is the Wilton 1m open star tip.
- For the drizzle I used strawberry sauce, you can find this in most supermarkets. I got mine from Lidl, I think it’s mostly used for decorating ice cream as it’s super thin, unlike regular jam.
Now that you understand the basics, it’s time to begin preparing the ingredients and start creating those cheesecake cups!!!


Strawberry Milkshake Cheesecake Cups
Description
The creamiest strawberry cheesecake recipe, with a soft butter biscuit base topped with yummy homemade whipping cream and a generous drizzle of strawberry sauce.
Ingredients
Biscuit Base
Cheesecake Filling
Decorations
Instructions
-
Start by crushing all of the digestive biscuits into fine crumbs (using a food processor or rolling pin).
-
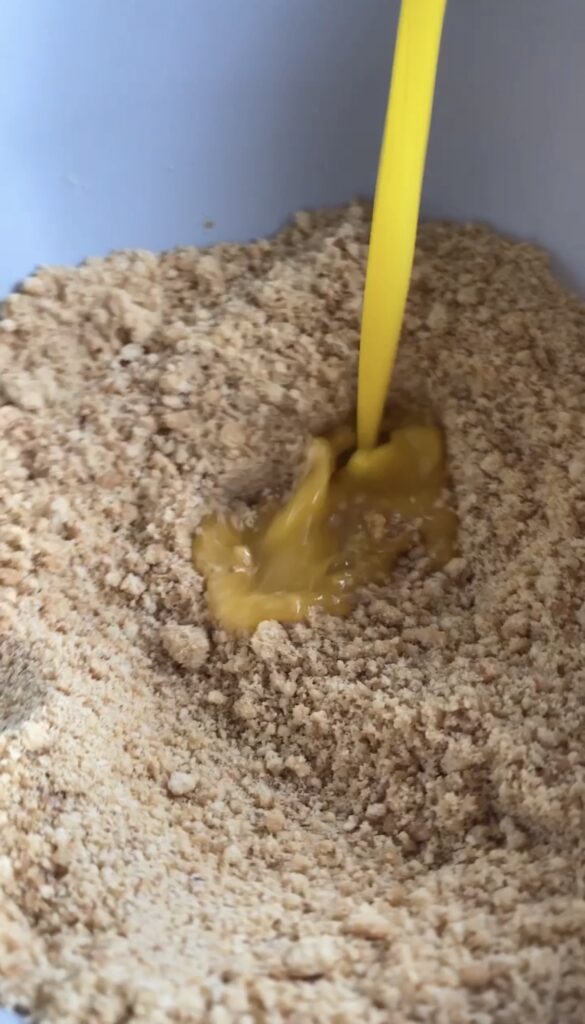
Melt the butter in the microwave for a few seconds until fully melted.
-
Add the melted butter to the crushed biscuits and mix to form a wet sand mixture.
-
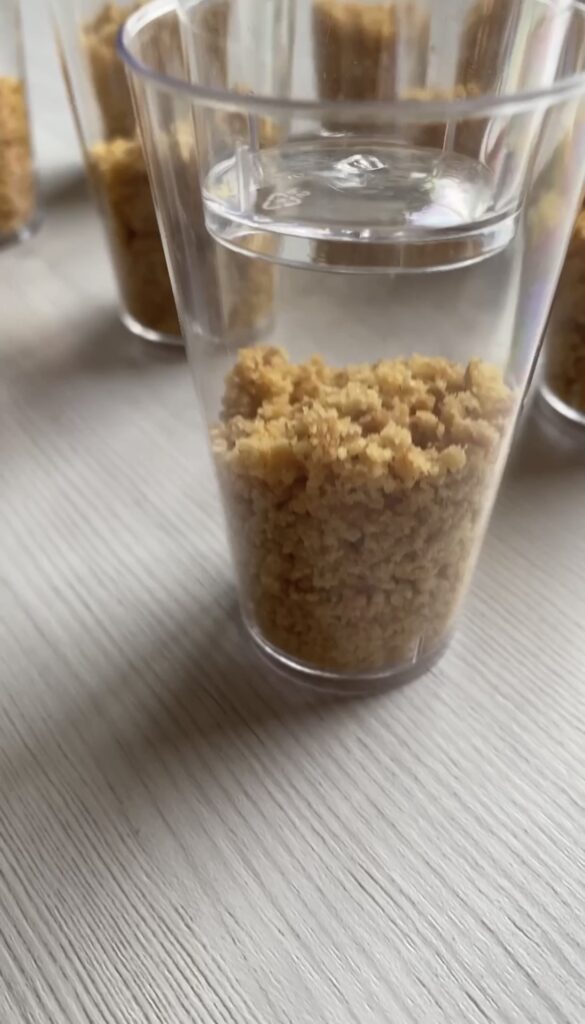
Then add 3 tsp of crushed biscuits to 16 dessert cups.
-
Press the biscuits using another dessert cup to create a perfectly flat base for the cheesecake.
-
In a large bowl whisk the double cream and the strawberry milkshake powder using an electric whisk, until stiff peaks form.
-
In another bowl mix together the cream cheese and icing sugar.
-
Then add to the double cream and whisk until fully combined.
-
As you whisk the cream the colour will appear lighter, this step is optional but I promise it will taste amazing regardless. Add a small amount of pink food colouring and mix until you are happy with the colour.
-
Once fully combined add to a large piping bag.
-
Pipe the mixture into each cup. Then tap the cups on a flat surface to push out any air bubbles.
-
In another bowl add double cream, icing sugar and vanilla, and whisk until stiff peaks form.
-
Then place the whipping cream in a piping bag using a piping nozzle of your choice.
-
Pipe a small amount of cream on each cup. Then drizzle with Strawberry sauce.
-
Place in the fridge to chill for at least 3 hours
-
Once chilled enjoy.
Note
This recipe Is definitely customisable. You could change the type of biscuit used for the base or you could play around with different flavours like the chocolate or banana milkshake powders. It's entirely up to you.

