
Looking for a quick, crowd-pleasing dessert that looks as amazing as it tastes? These no-bake strawberry cheesecake cups are rich, creamy, and perfectly portioned—ideal for gatherings, date nights, or sweet cravings. With a buttery biscuit base, luscious vanilla cheesecake filling, and sweet strawberry topping, they’re a dreamy twist on the classic cheesecake—no oven required!
*This post may contain affiliate links. Please read my disclosure for more details!*
Why You’ll Love This Recipe:
• No baking needed – just chill and serve
• Perfectly portioned in cups or jars
• Simple ingredients you probably already have
• Easy to customise with your favourite toppings
Equipment You’ll Need
- Mixing Bowls – One large and one medium
- Electric Hand Mixer or Stand Mixer – For whipping cream and blending the filling
- Spatula or Spoon – To fold and layer the mixture smoothly
- Rolling Pin or Food Processor – To crush the biscuits finely
- Kitchen Scale & Measuring Spoons – For accurate measurements
- Small Serving Cups or Jars – Clear ones show off the layers beautifully. For this recipe, I used 3oz round dessert cups because they are the perfect portion size. However, feel free to use whatever you like.
- Piping Bag (Optional) – For neat and decorative filling. It makes filling each cup a whole lot easier so I definitely recommend using one.
*I earn a small amount of money if you buy the products after clicking on the links. You will not be charged anything extra for this. Thank you for supporting SabsBakes!
Making The Biscuit Base
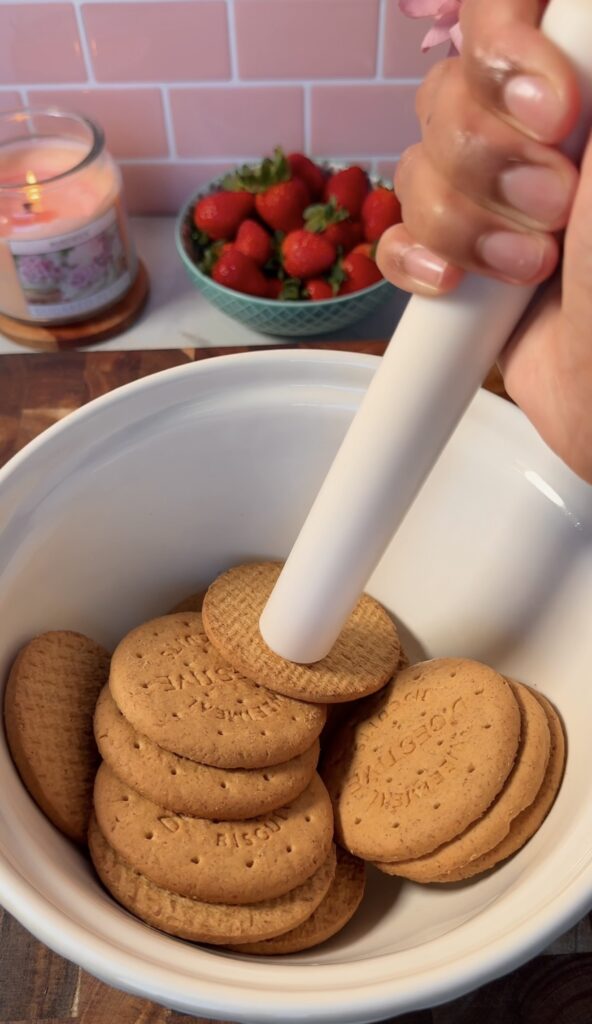
When making the biscuit base my go-to biscuit is usually digestives because they aren’t overly sweet, which complements the cheesecake flavour really well, they are also super easy to find in your local grocery store.
The quickest way to crush up your biscuits into fine crumbs is by using a food processor, this will also ensure your biscuits are crushed evenly. However, if you don’t have a food processor or prefer not to use one you can use a rolling pin. In the video, you may have noticed I like using my fondant rolling pin because it has a perfectly flat edge making it super handy for crushing biscuits. I think I use my rolling pin more for crushing biscuits than I use it for rolling out fondant, it is definitely one of my favourite baking tools.
With dessert cups I prefer to add less butter in comparison to a classic cheesecake recipe because if the base is solid the biscuits will get stuck at the bottom of the cup, making the entire dessert difficult to enjoy.
Tips & Variations:
- The easiest way to achieve a flat base is by using another dessert cup and pressing the biscuits gently. This will make ur cheesecakes look super neat and tidy, but also provide a flat surface ready for the cheesecake filling.
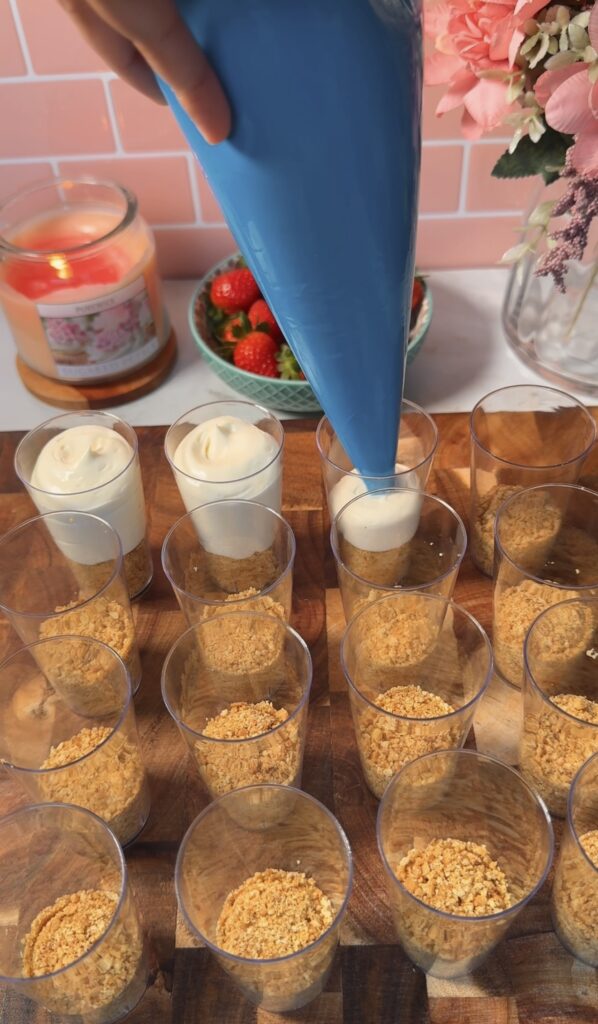
- Using a large piping bag to fill each dessert cup will make the process super easy and quick. Make sure you leave a little gap at the top for the jam and strawberries. Once you have filled each cup, gently tap each one on a flat surface to push out any bubbles.
- Swap strawberry jam for raspberry, blueberry, or lemon curd.
- Add a splash of lemon juice to the filling for extra tang.
- Crumble a biscuit on top for extra crunch before serving.
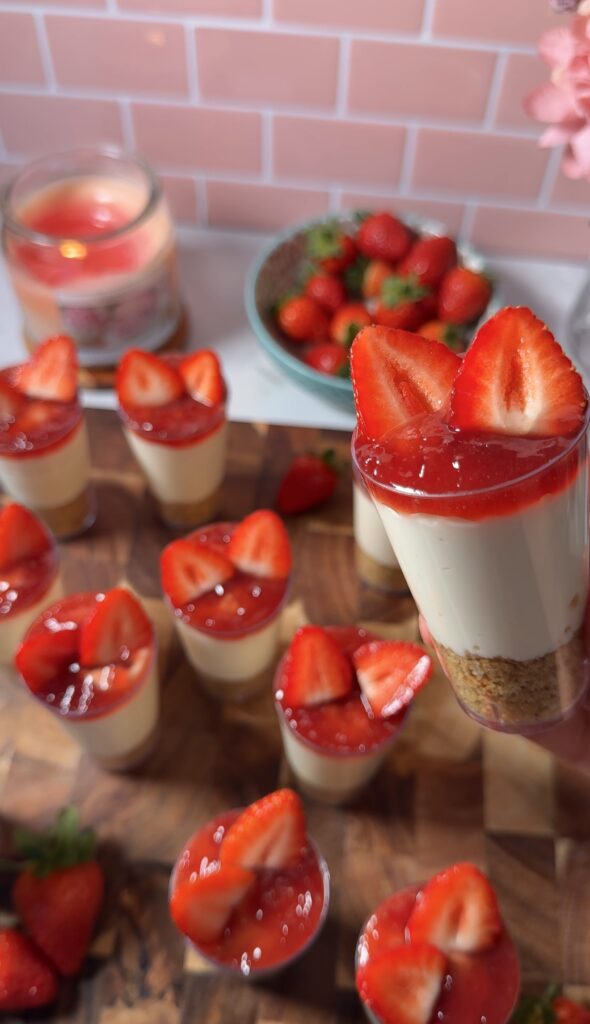
Decorating:
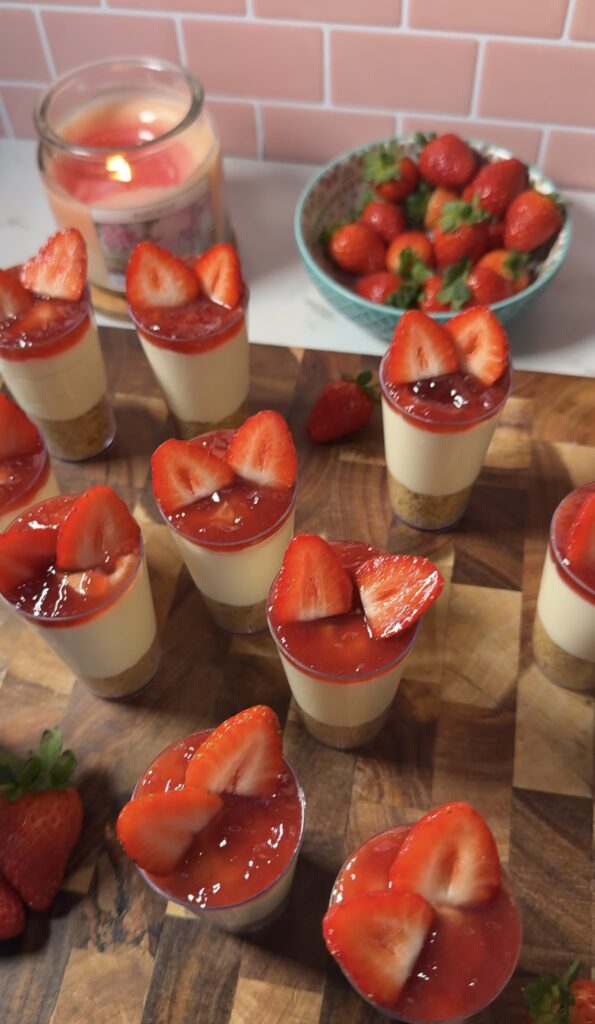
Dessert cups are so much fun to decorate—the possibilities are endless, and you can style them any way you like! I added a couple of teaspoons of strawberry jam, then topped each one with a halved strawberry for a simple, elegant finish.
Storage:
Store in the fridge for up to 3 days. Best enjoyed chilled.
If you like this No-bake Dessert cups series you may also like…
- Ferrero Rocher Cheesecake Cups
- Biscoff Cheesecake Cups
- Strawberry Milkshake Cheesecake Cups
- Easy Chocolate Moose Dessert Cups

Strawberry Cheesecake Cups
Description
Easy No-Bake Strawberry Cheesecake Cups – Creamy & Delicious Dessert
Ingredients
Biscuit Base
Cheesecake
Decorations
Instructions
-
Crush the digestive biscuits into fine crumbs using a food processor or by placing them in a bag and smashing with a rolling pin. Pour in the melted butter and mix. Spoon about 3 tablespoons into the bottom of each dessert cup and gently press down to form the base. Set aside while you make the filling.
-
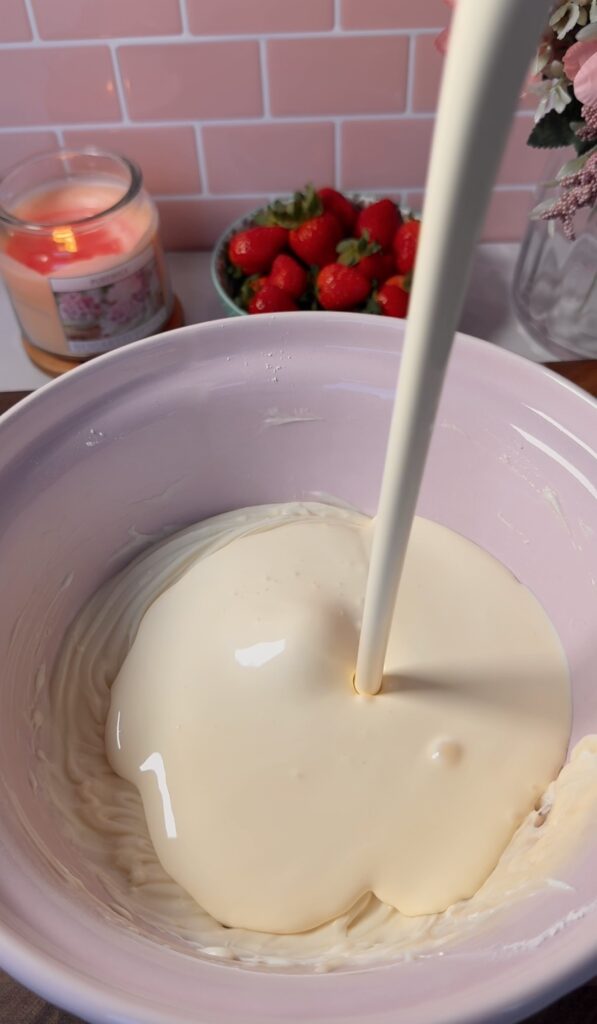
In a bowl, whip the soft cream cheese with the icing sugar and vanilla until smooth and creamy. Pour in the double cream and continue mixing until the mixture thickens and starts to hold its shape—just be careful not to over-mix.
-
Spoon or pipe the cheesecake mixture over the chilled biscuit bases. Give each cup a gentle tap on the counter to release any big air bubbles.
-
Add a thin layer of jam on top of each cheesecake, then finish with a halved strawberry.
-
Chill in the fridge for at least 2–3 hours, or overnight if you can, to let them set properly.
-
Once chilled, they’re ready to enjoy!
Note
To make the double cream from stiff peaks quicker leave the bowl in the fridge, until you are ready. The colder the cream the better and quicker it will whip.
I’d recommend washing the strawberries in advance so they have time to dry.